Project Log: Thursday, February 27, 2014
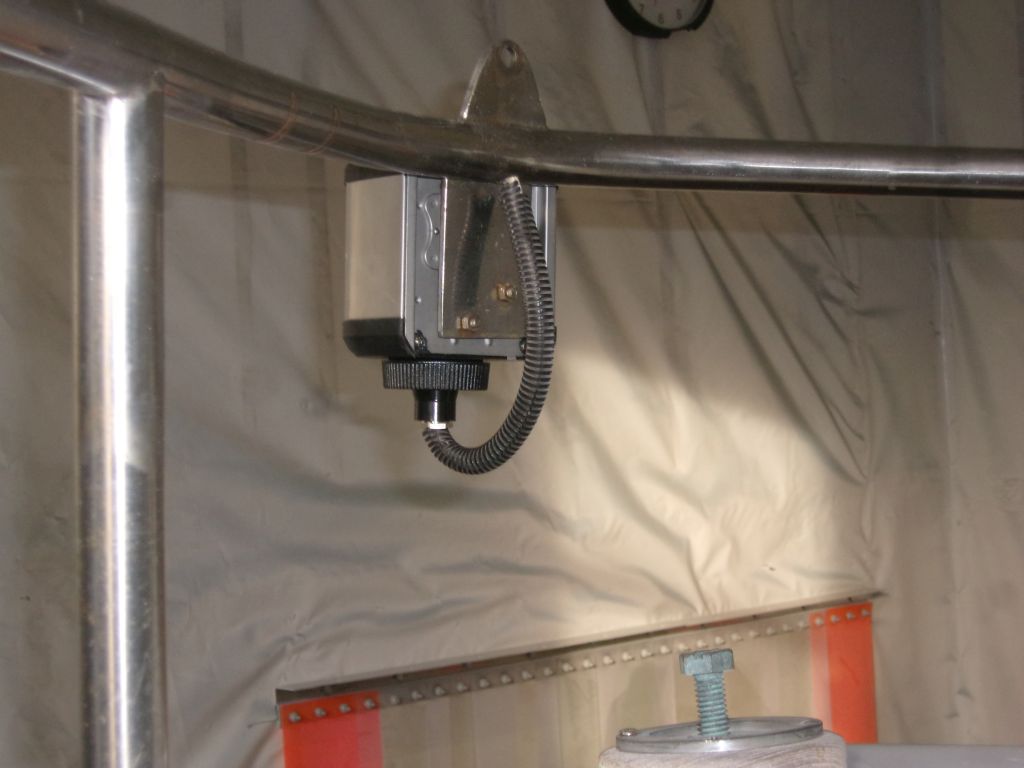
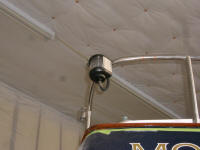
As a sort of dry run for installing the red and green
sidelights, I thought I'd wire up and install the stern
light first, to get a sense of how much wire was
required to insert into the fitting for connection, and
to allow the light to be removed for maintenance/bulb
replacement. Since there was an existing bracket
on the stern pulpit, and the old stern light was the
same thing, installing the new one would be a good trial
before I finalized the installation on the new running
boards (which were now complete, untaped, and ready to
install).
|

 |
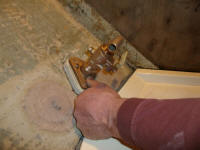
After determining the wire already in place in the stern
pulpit was in good condition, I'd left it in place
rather than replace it, and had left an ample amount
dangling by the stern light bracket. To wire the
stern light, I led the end of the cable into the fixture
after removing the various collars and clamping nuts,
then stripped the wire ends and inserted them in the
wire clamps provided within the fixture, beneath the
bulb housing. After reassembling the light base,
it was easy to install it on the bracket. I left a
small wire loop beneath the light, and added some split
loom for better looks. Sometime later, I'd
finalize the wire connection between the pulpit light
and the new cable I'd run from the electrical panel.
The job was straightforward, but required a fair bit of
fussy work with tiny screws, but all in all I liked the
fixture. |
 |
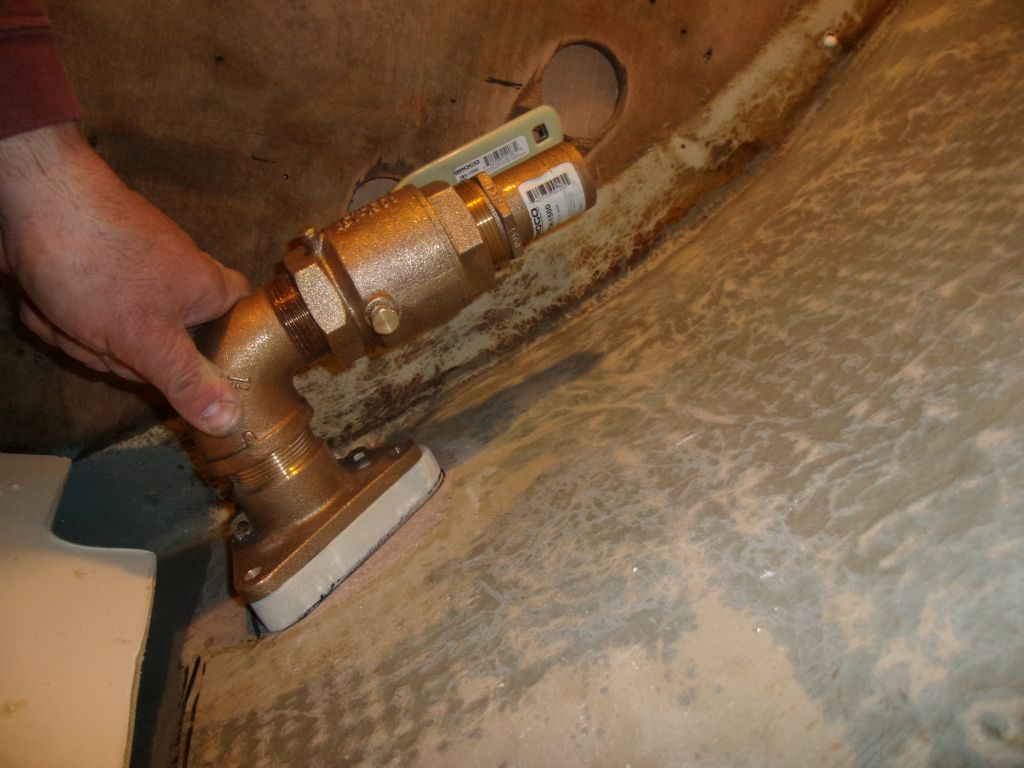
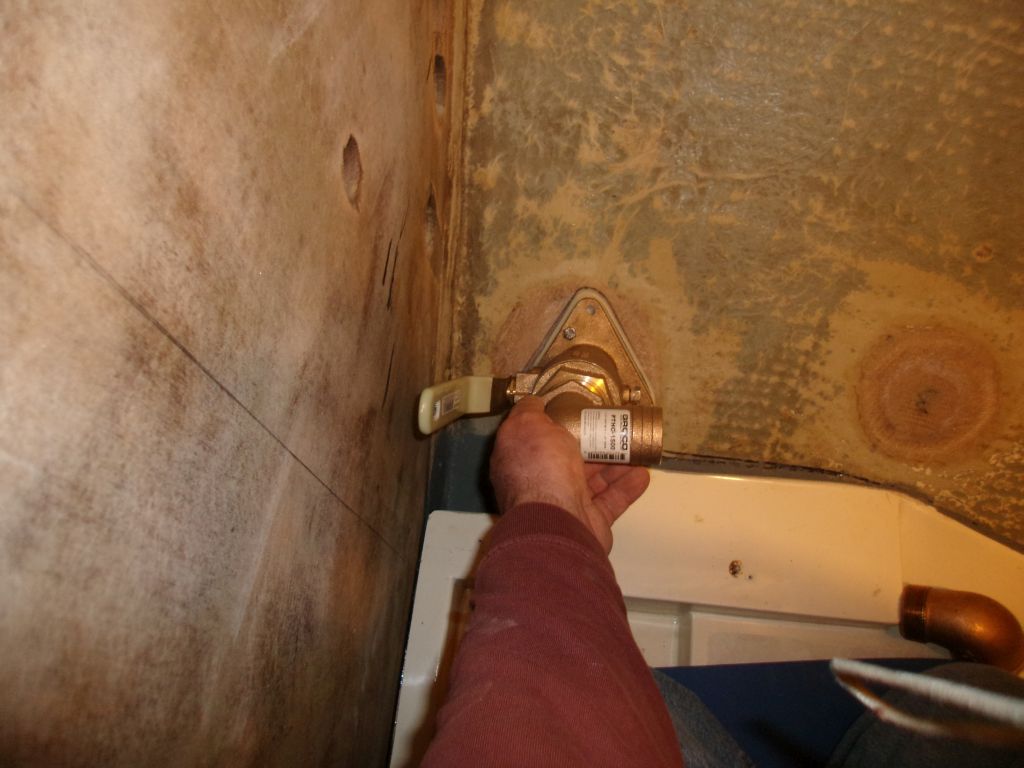
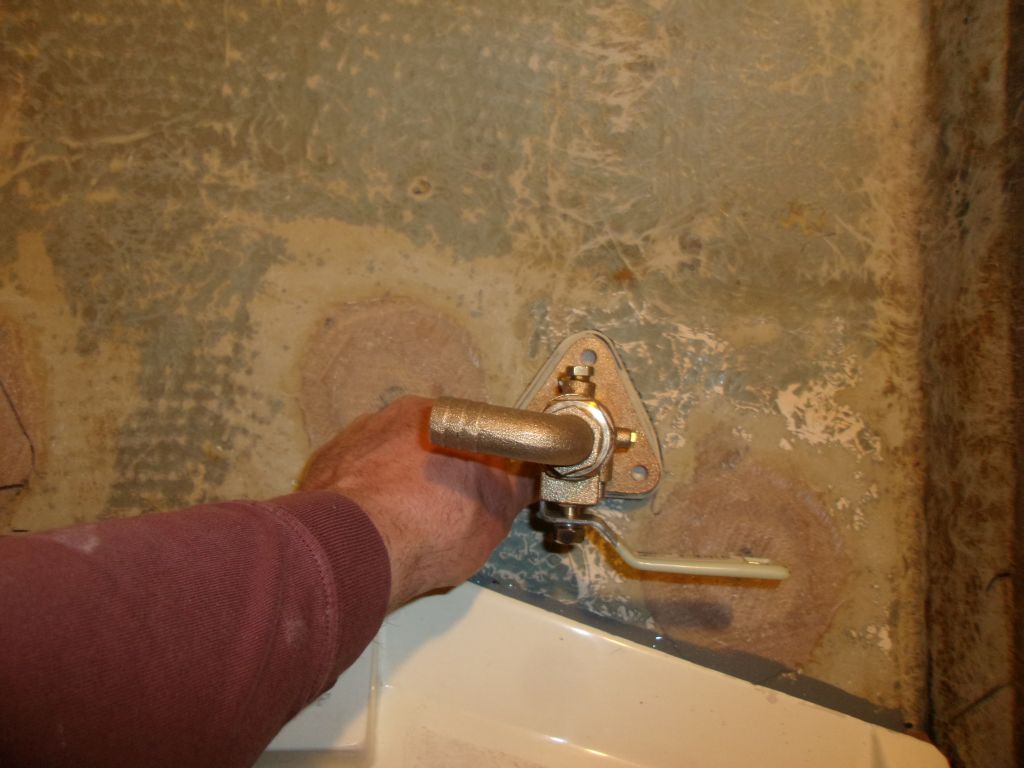
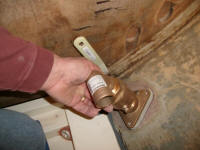
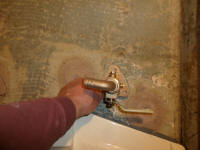
Back in the head, I mocked up the two seacock
arrangements, for the head intake and discharge, to get
a sense of their final placement and how various
configurations might affect and dictate the final height
of the platform for the marine toilet. The valves
would go beneath the platform, but would remain
accessible from the inboard side.
My initial thought in an attempt to save space, and keep
the platform at a usable height, was to use a 90° elbow
between the through hull flange and the 1-1/2" valve
body, hoping this would keep the arrangement as low as
possible by sort of paralleling the hull itself. I
roughed out some height marks on the adjacent bulkhead
to clear the assembly. |


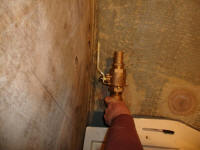 |
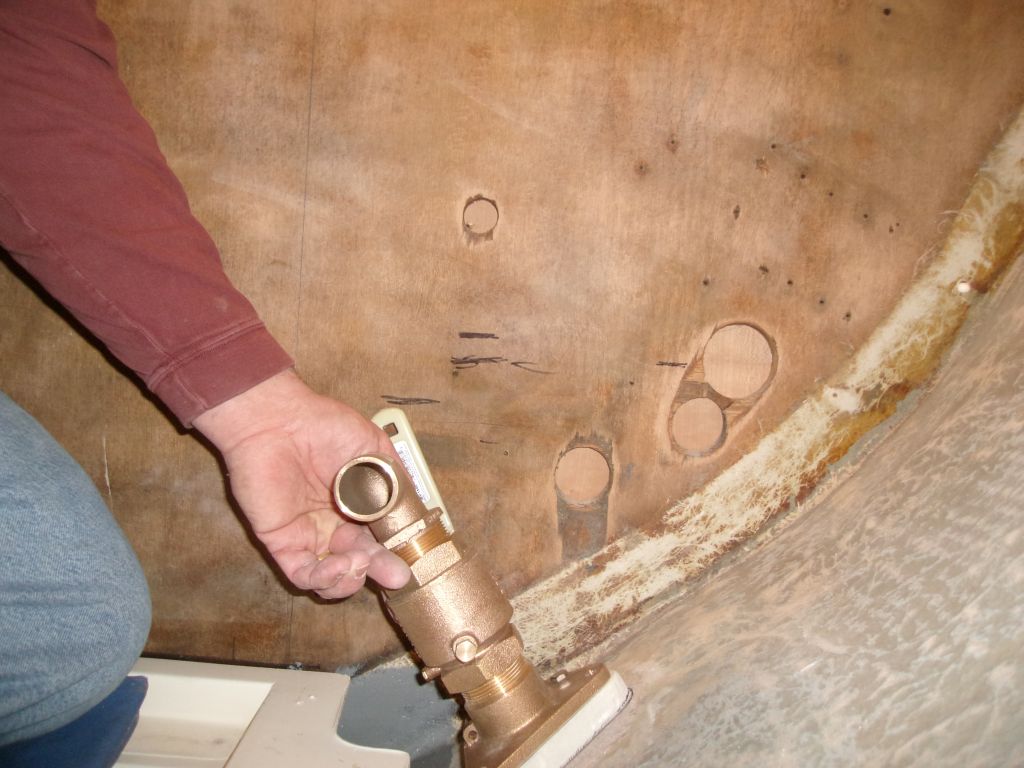
However, the more I looked at this, I wasn't sure.
The real problem arose from allowing the valve handle
room to operate. When closed, the handle projected
well above the valve body, and essentially negated the
space savings afforded by the elbow. Plus, the
elbow still raised the height quite a bit. In
addition to the orientation shown above, I also turned
the valve 90°, to aim forward rather than "upward", and
this had some merit, but the valve handle was still a
significant problem.
So I decided to try the valve in its normal, vertical
position, eliminating the elbow (which, ideally, I'd
prefer anyway), and using a 90° hose fitting on the
valve to turn the hose. As it happened, this
worked out better: the overall clearance height
required actually ended up a bit less than with the
elbow, with no additional room required for the valve
handle, and an easier orientation of the valve for
regular operation.
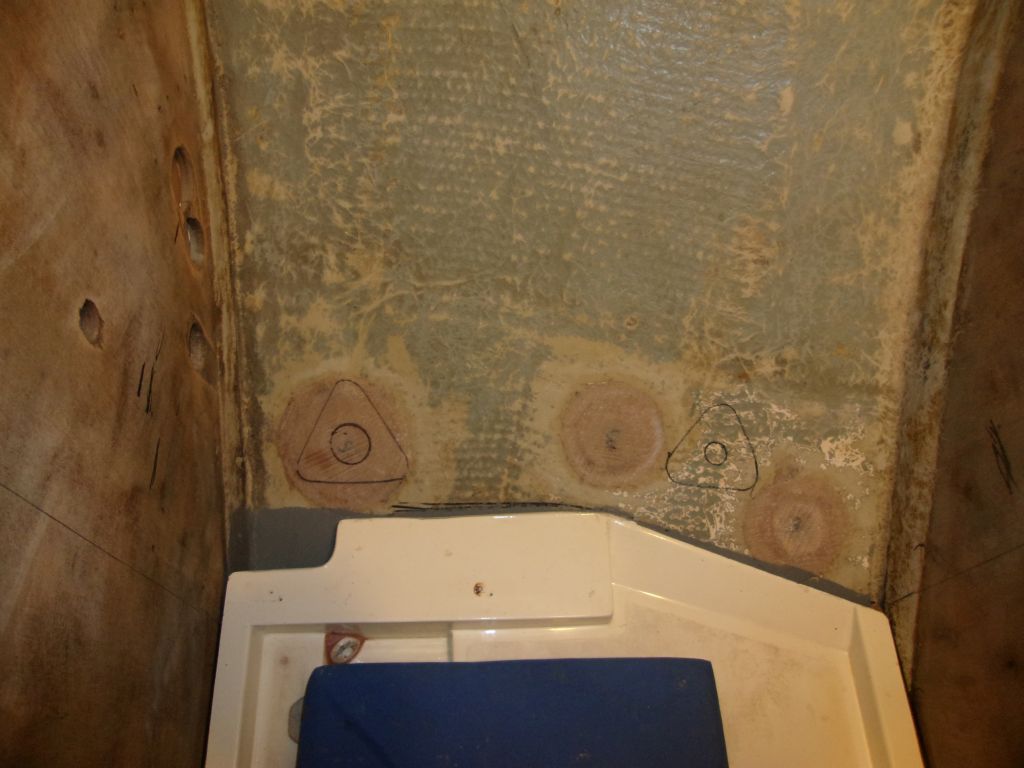
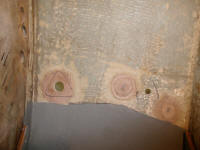
In the last photo of this series, you can see the black
marks on the bulkhead: the two upper ones were the
ones from the 90° valve alignment, while the lowest one,
just behind the valve, represents the minimum height of
the platform with the valve in its vertical orientation. |

 |
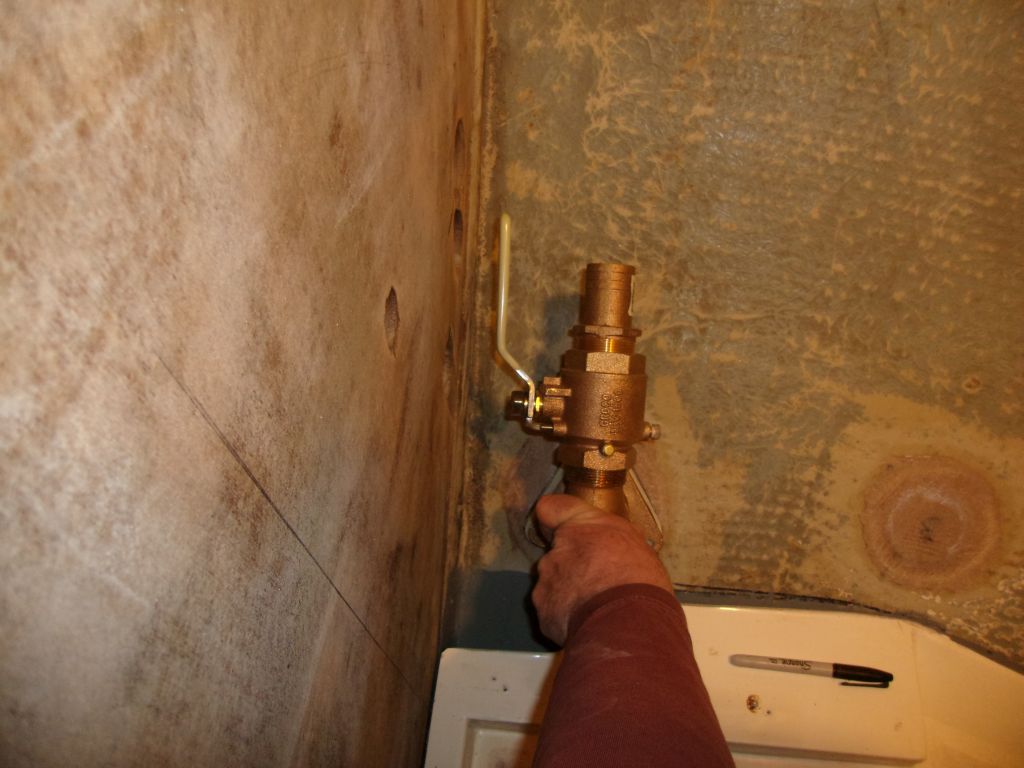
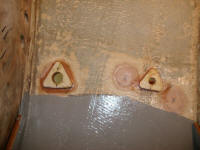
Satisfied with this arrangement, I marked the hull
around the fiberglass base plate for future alignment
purposes. Then, I tested the smaller 3/4" fitting
assembly for the intake; its height was less than the
big valve, and after a time I determined the most
favorable location for the valve and marked its base
plate location as well. |
 |
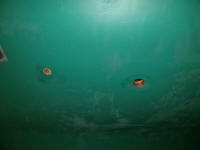
Afterwards, I drilled the holes for the through hulls
themselves, as marked. |
 |
Finally, I epoxied the two base plates to the hull,
keeping them aligned with the marks and with the holes
in the hull. I left these to cure so they'd be
ready for the through hull/seacock installation next
time. |
 |
| |
Total Time Today: 2 hours
|
<
Previous | Next > |
|
|