Project Log: Sunday, December 4, 2011
With a slow and late start after doing some other things
in the shop, my first task was to install the plumbing
fittings on the forward water tank, which I'd not had
time to do yesterday along with the other tanks, but for
the sake of continuity wanted to get out of the way.
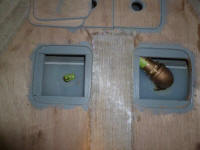
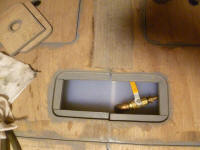
In order to install the elbow for the tank fill, I found
I had to trim away one of the support cleats for the
small hatch in the berth platform above, as the elbow
was too tall to thread into place otherwise. |
 |
I'd mostly made up my mind to start work on the overhead
and some of the trim in the main cabin, beginning with
patterning the underside of the sidedecks above the
dinette and galley, but I couldn't find the motivation
to dive in. Instead, I decided to install
(temporarily) the main heating unit for the main cabin.
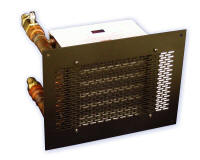
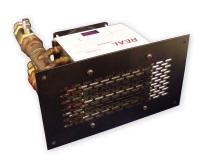
Heat from a hydronic heating system can be dispursed in
several different ways; in this case, my system
specified two so-called fan heaters, which were copper
coil-based, finned radiators with a small 12-volt fan
behind, which would blow air over the hot water-heated
coils and into the living spaces.
Based on a simple volumetric calculation for this boat,
I selected two units based on their appropriate BTU
ratings: one 7000 BTU fan heater for the main
cabin and other living spaces, and a second, smaller one
(3500 BTU) for the pilothouse. Because the space
was very small, and our heating needs were not complex,
I chose fan heaters attached to simple grills for ease
of installation, with a single outlet in both main cabin
and pilothouse. |
 |
Other choices could have included fan heaters with one
or more outlets for ductwork to more widely disperse the
heated air, but I saw no need for this sort of
installation here. Additionally, I had plenty of
room for the single, directly-mounted fan heater beneath
the dinette, which was a generally central location.
I considered an additional outlet forward, but decided
against it since the 7000 BTU unit was more than large
enough for the entire living space (as I'd calculated),
and we didn't want heat directly in the sleeping cabin
anyway. In any event, our heat would mostly be
used in summer months and the shoulder seasons, when it
might be used to take the chill off rather than provide
life-sustaining heat, and there was no need to go
overboard on the installation. I could always add
additional fan heaters later if I saw the need.
While there was nothing simple about this overall
installation, everything I could do to keep it as simple
as possible would be worthwhile.
I chose the large cabinet beneath the center of the
dinette for the installation. This location was
ideal because of ease of access for installation and
operation of the fan heater and its related hoses, plus
it was centrally located and out of the way. I
decided to cut the hole for the heater now since it was
a large hole, and I felt it was best to get the cutting
out of the way before I began trim and additional
varnish work in the main cabin.
The fan heater featured a metal grill attached directly
to its front, and installation was a matter of cutting
an appropriate-sized hole in the cabinet face and
screwing the grill to the cabinet; the coil heater was
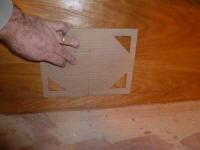
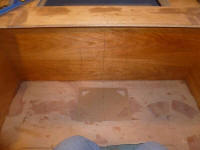
supported by the grill itself. I made a cardboard
pattern of the grill, then made some cutouts to demark
the opening I needed to cut in the cabinet. To
maintain the stability of the pattern, I only cut out
triangular wedges at the four corners of the proposed
cutout; this made it easy to align the template on the
cabinet front and mark the corners, which marks I then
connected with a ruler. I held the grill 2" above
the cabin sole substrate to allow for the finished sole
and some trim, while keeping the heater as low as
possible for best heating, and aligned the opening in
the center of the cabinet lengthwise. |
 |
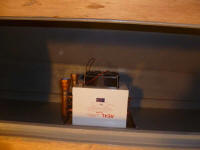
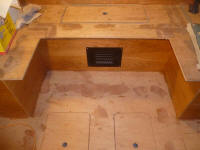
After marking the opening and double-checking its
position, I cut out the center, inserted the fan heater,
then marked the four screw locations. I drilled
and tapped these holes for machine screws, and
temporarily installed the heating unit. Later, I'd
build a protective cover inside the cabinet. |
 |
When spec'ing the equipment for this install, I'd
considered the grillwork, as there were several material
choices: white, black, stainless, and brass.
For a while, I thought I'd go with stainless, but
ultimately I chose black for its simplicity and because
I thought the stainless might stand more than the black.
I didn't dislike the black, but began to wonder if I
should switch to a brass grill. We'll see.
With the table and other finished items in place, I
didn't think the grill would stand out much in this
location no matter its color. |
| |
Total Time Today: 3 hours
|
<
Previous |
Next > |
|
|


