Project Log: Monday, September 5, 2011
The next major interior structure to consider was the
galley, located opposite the dinette in the main cabin.
I'd removed the small quarterberth that featured in the
original Fisher 30 interior, and therefore had the
entire length of the cabin on the starboard side to use
for a more spacious and useful galley. However,
there were natural limitations on the layout and size,
so the basics of the design weren't anything
earth-shattering or difficult to conceive.
My galley arrangement hinged on three known quantities:
a propane range; an Engel electric stand-alone
refrigerator; and a sink. I hoped to arrange these
features in a useful and attractive way. But first
I needed some idea of the space I actually had to work
with.
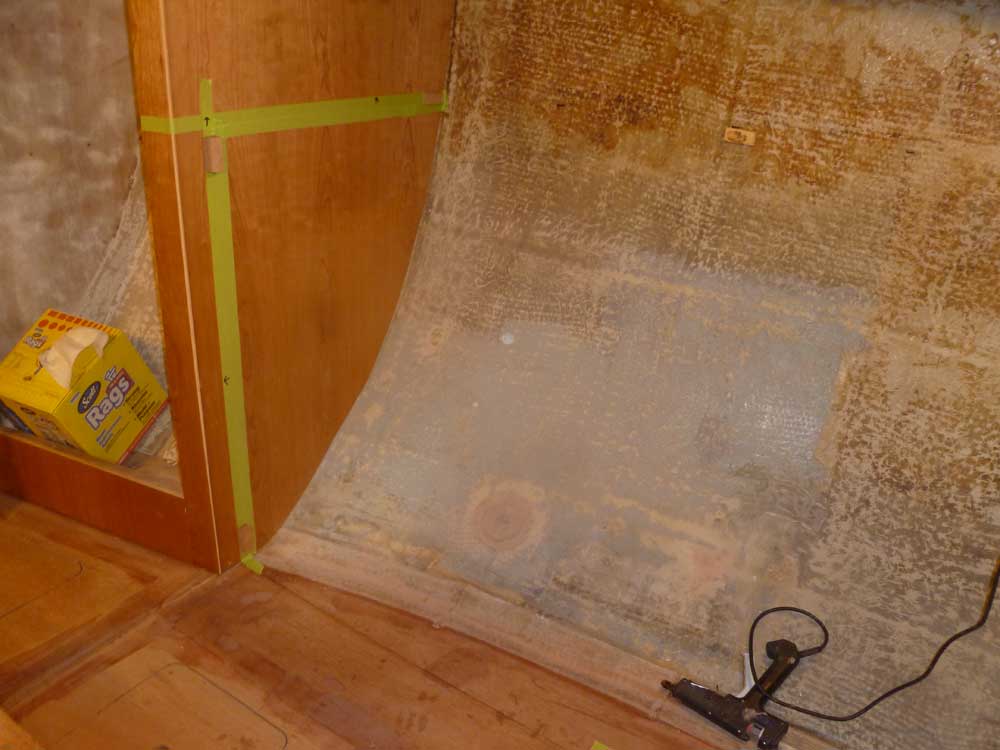
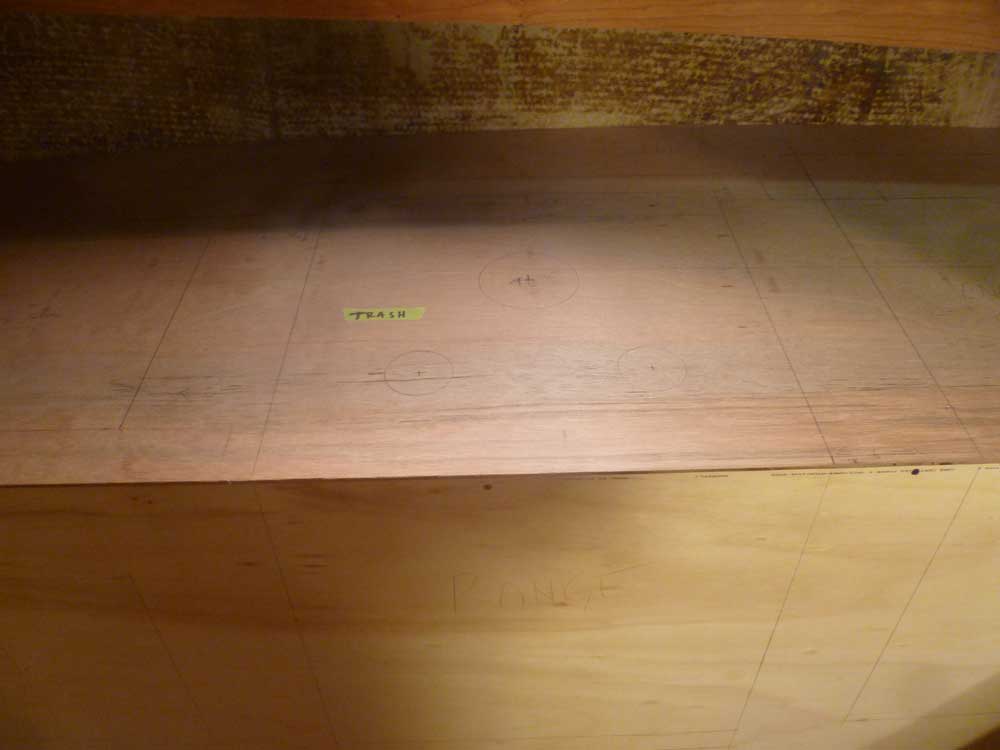
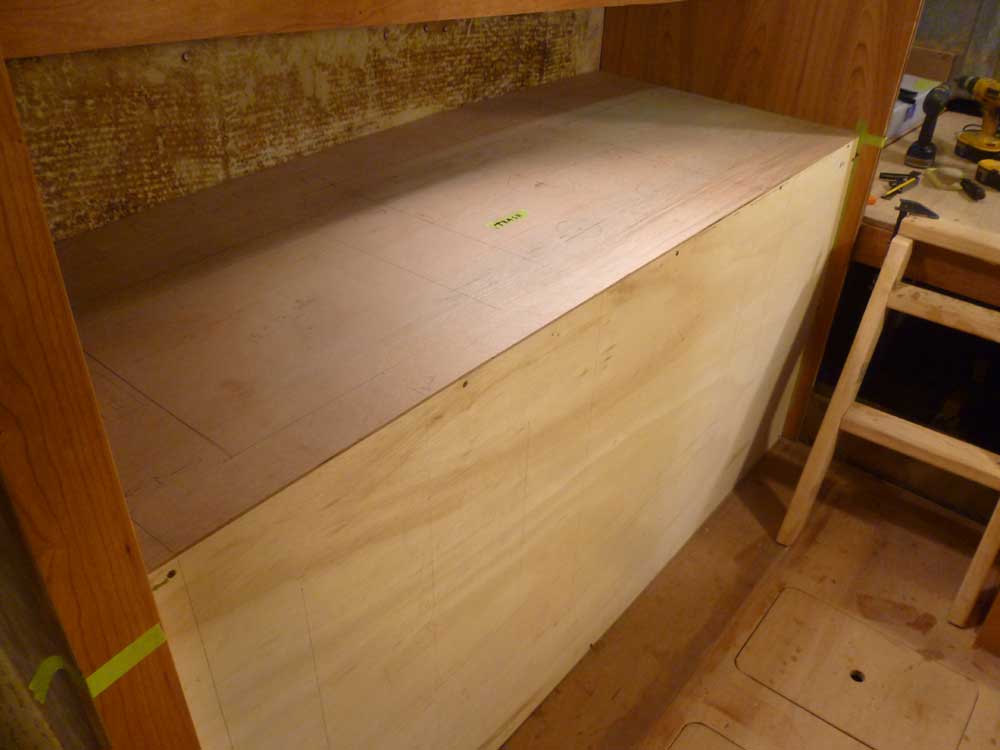
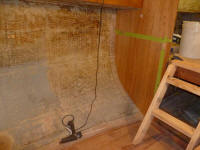
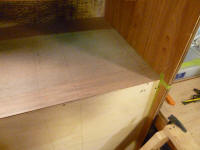
To that end, I made some measurements and laid out the
basic outline of the galley on the forward and after
bulkheads that defined the space. I offset the
front of the cabinet 2" from the passageway, which
matched the offset of the dinette opposite, struck a
line parallel to the centerline of the boat to the
opposite bulkhead, and marked a similar plumb line.
I defined the countertop at 36" above the sole, a
standard and comfortable height. I marked off the
outline with tape, both for visual purposes and to give
me a place to hot-glue temporary support blocks without
damaging the wood bulkhead surfaces. |
 |
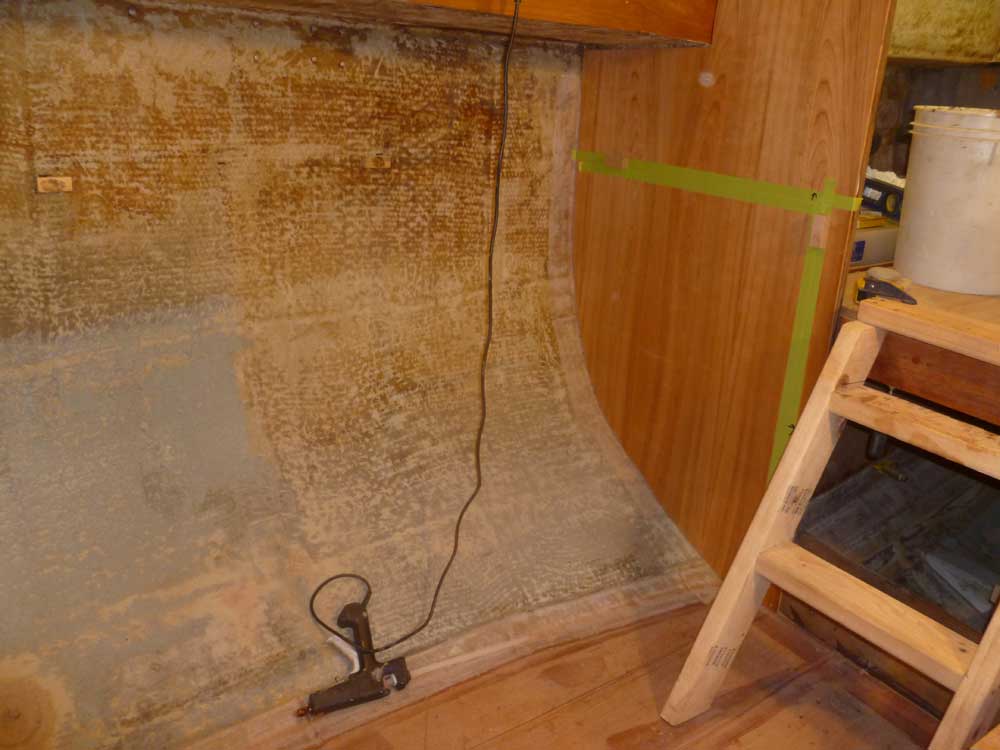
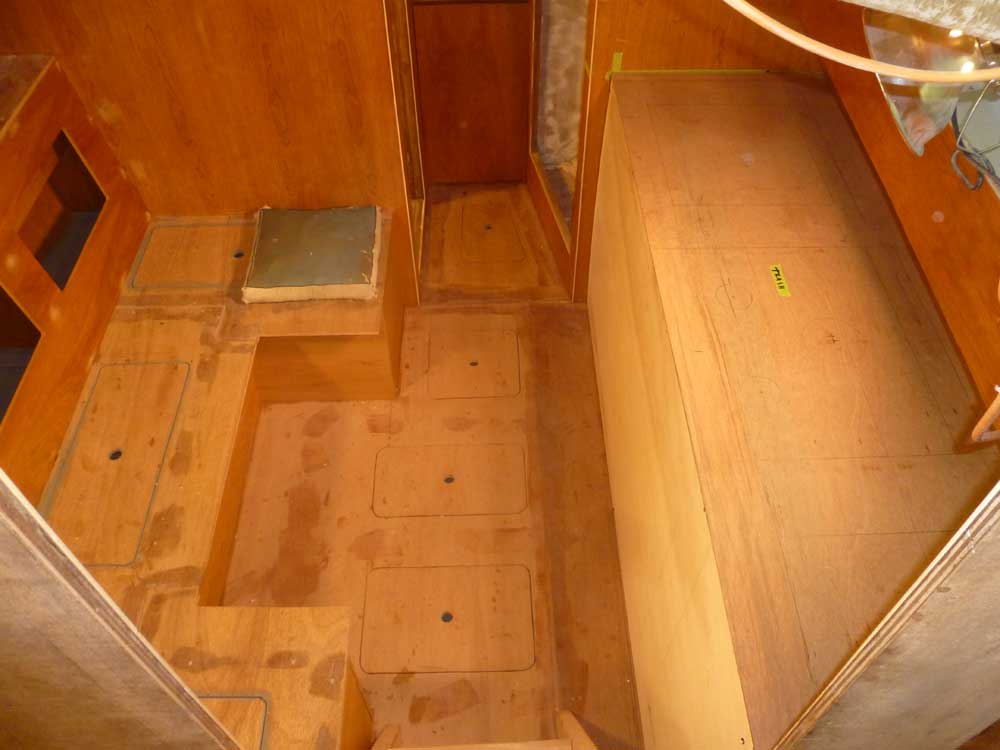
I measured and cut a mockup cabinet front from 1/4"
pattern plywood, then installed a longitudinal cleat
along its top edge to hold it straight and true. |

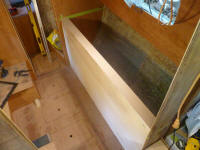 |
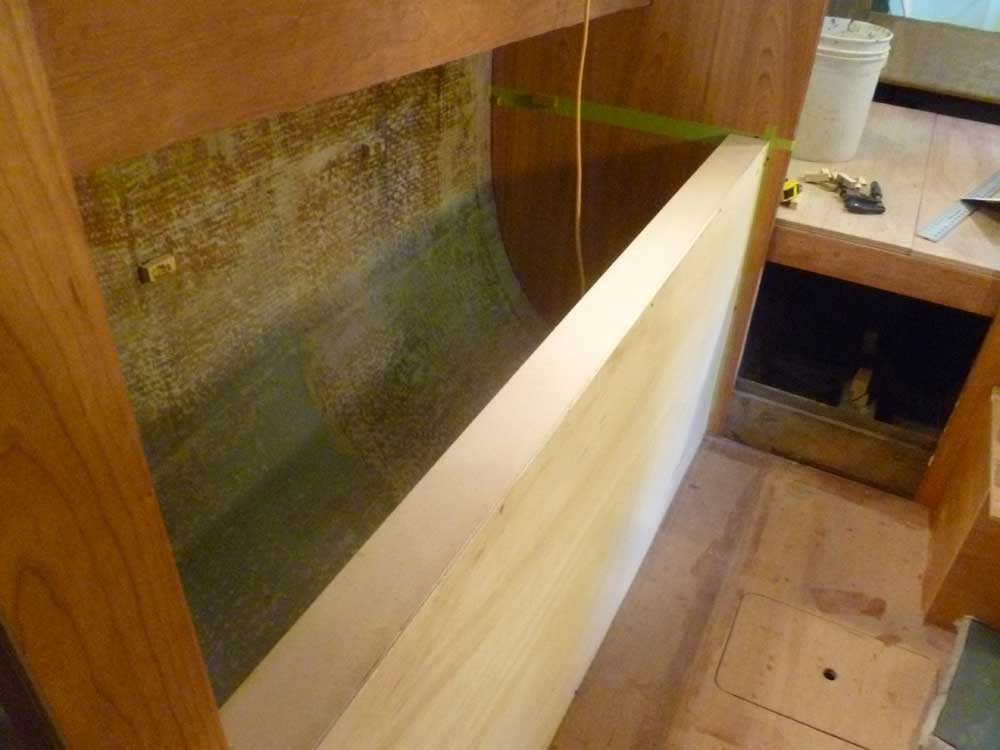
Next, I cut another piece of plywood to simulate the
countertop, scribing it to fit the hull and against the
forward and after bulkheads. Since I'd also use
these mockup sections as patterns for the real material
when the time came, I drew reference lines (scribes) on
the various edges to accurately reflect the true shape
of the adjacent surface for later layout purposes. |
 |
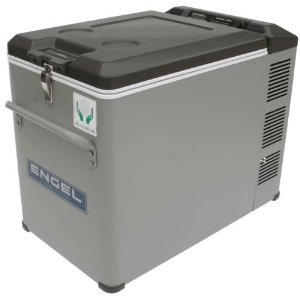
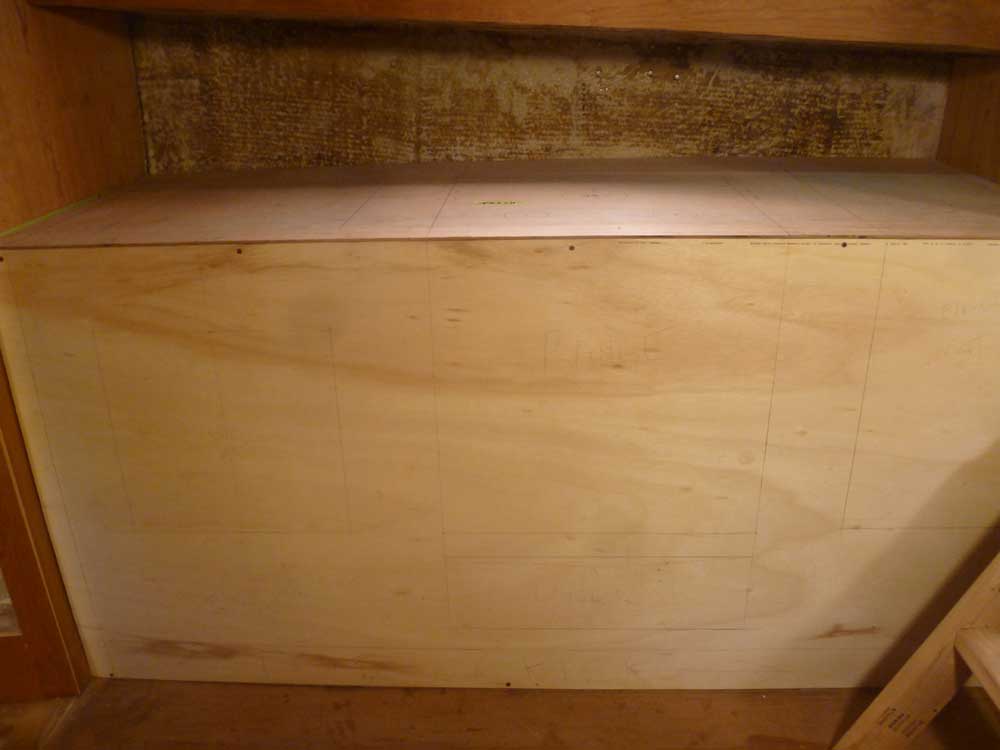
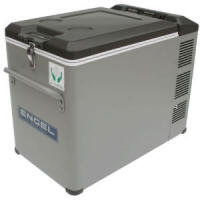
I had the measurements for the full line of Engel
refers, and had vague dreams about the MT60 combi model
that included separate compartments for freezer and
refrigerator. However, this particular unit was
simply too large for the space I had. The
dimensions, taken without context, hadn't seemed so
large, but when I put tape measure to my new mockup it
quickly became apparent that this unit was far too big
to comfortably fit. I quickly retooled my thoughts
and settled on the more manageably-sized MT45, which I'd
pretty well known would be where I'd end up anyway.
After considering all alternatives, I ordered the Engel
MT45 so I could have the actual unit on hand when I was
ready to build the storage compartment. |
 |
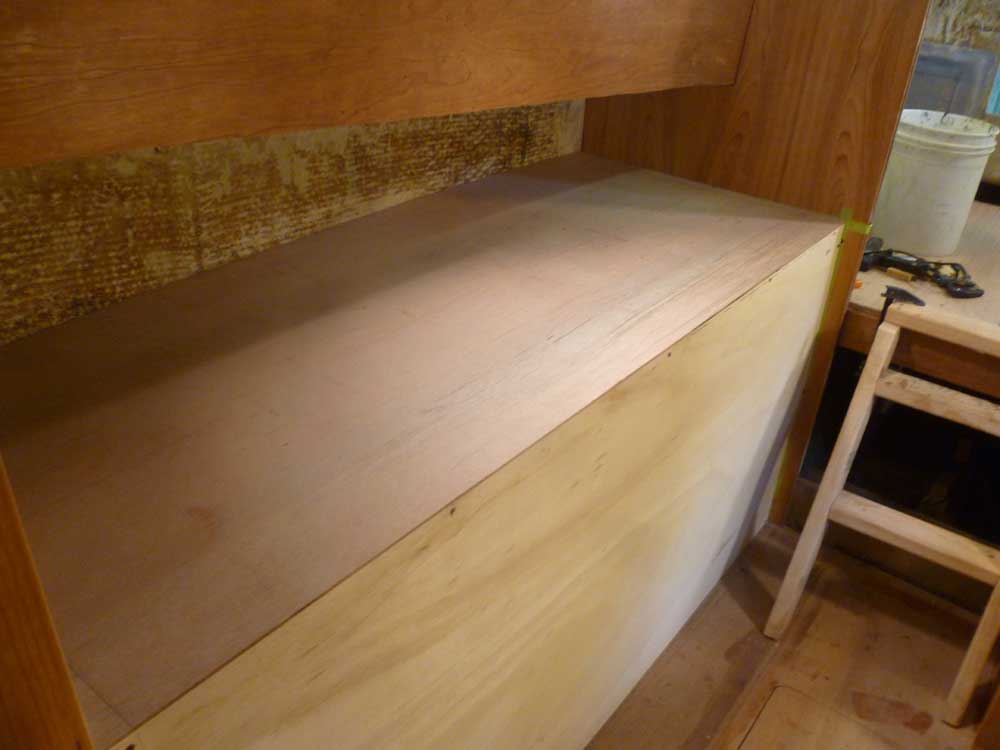
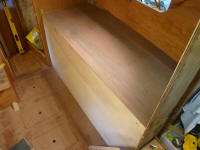
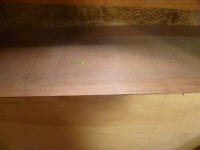
It seemed logical to me to put the refer at the
aftermost end of the countertop, so in that area I drew
some basic lines to demark roughly the space the refer
would require, allowing extra space for ease of
placement and adequate ventilation. Note that the
dark line to the right, nearest the bulkhead, is my
scribe line for the countertop pattern, not a
representation of the refer outline. Basically the
refer would fit in the space between the bulkhead and
the lefthand layout line. |
 |
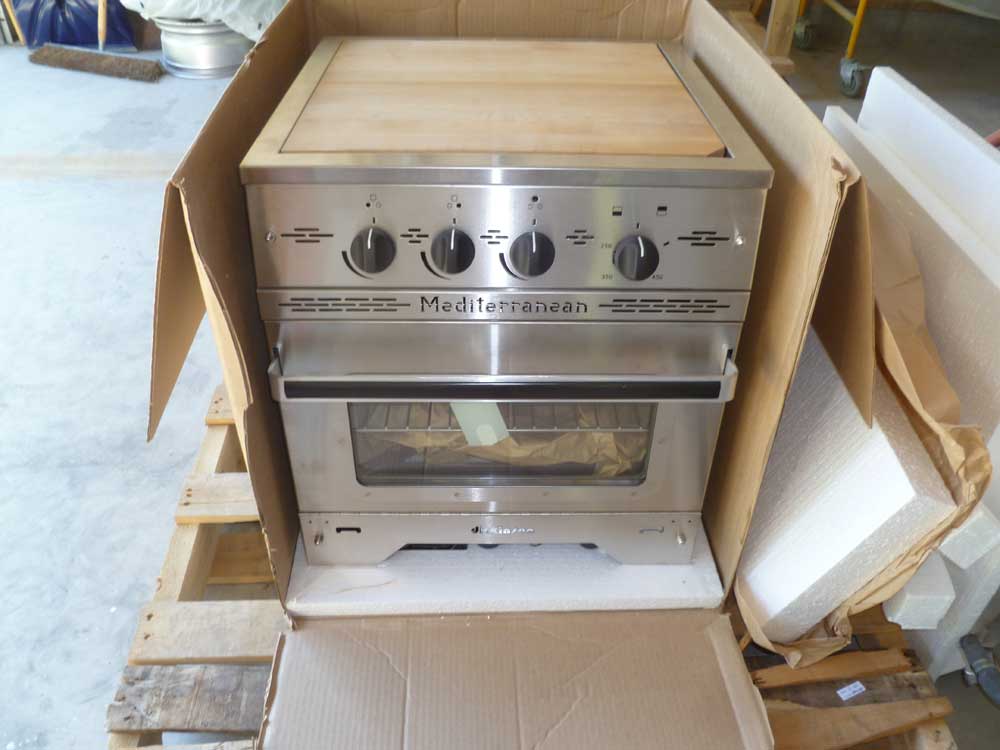
With these marks in place, I moved on to the rough
placement of the 3-burner propane range. After
looking at all the alternatives in some detail over the
past months, I eventually selected the Dickinson
Mediterranean range for its features (hotter burners and
oven) and growing positive reputation. To ensure that I
could accurately build the galley around the stove, I'd
purchased the unit several weeks earlier, and had it on
hand in the shop for real-life measurements. |
 |
Counter to the norm, I made the decision to flush-mount,
rather than gimbal, the range. We had a gimballed
range in our previous boat, and frankly never used the
gimbal capability. We don't take long passages,
and are only cooking in safe harbor, not underway.
A number of seasoned voyagers suggest that good pot
clamps, versus gimbals, are an effective and safer
choice even for offshore work. Therefore, I
thought I'd save the hassle and wasted space of a gimbal
system that would not be needed for our intended use of
the boat, and I though the built-in would provide a
cleaner appearance too.
With all this in mind, and the stove's dimensions--on
paper and in reality--in hand, plus the required safe
clearances for the burners from combustible surfaces
overhead, I marked off the cutout for the range several
inches forward of the refer space, in a location that
would be comfortable for use, leave counterspace all
around, and also (not by accident) happened to be in the
widest portion of the boat, ensuring that the stove
would remain clear of the overhanging cabin trunk as
much as possible.
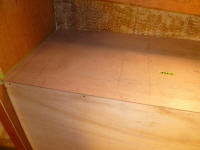
The little note reading "trash" is something I put on
there at the end of the day when I remembered that I
wanted to build in convenient trash can stowage; I'd not
accounted for this in the layout so far, and didn't want
to end up with a trash can in some awkward spot in the
finished boat, like last time. I'd probably make
some minor changes to my overall layout to accommodate
this later, after I had time to cogitate. |
 |
With the layout underway, it seemed as good a time as
any to locate and purchase a sink. With the basic
dimensions of the available space in mind, I eventually
found a suitable sink online--not too small, not too
large, not too shallow, not too deep, and, perhaps as
importantly as anything, not too expensive. I had
a hard time accepting the prices of many of the sinks I
found during my research and couldn't begin to
understand why they cost what they did.
I chose a simple bar sink, 15x17x7, and capable of
undermount or surface mount. Nothing fancy, but
just what I wanted. With the basic dimensions, I
laid out roughly where I thought the sink would go.
Note that all of these layouts were subject to
manipulation later; hence the point of the mockup.
Sorry for the poor photos. The pencil lines
showing the layouts don't show up well, but there you
are. If you squint you can see them. |
 |
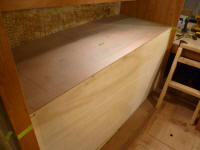
With the three major features roughly placed, I drew out
a couple proposed outlines for lockers against the hull,
though their final configuration was somewhat down the
road. I also marked the cabinet face with proposed
locker doors (under the sink and also under the range),
and marked out a 4" tall toe kick that I intended to
incorporate into the final cabinet. Beneath the
sink locker, I thought I might build a recessed area to
contain the foot pump pedals for the manual faucets, so
they wouldn't protrude awkwardly; I marked this on the
mockup, but didn't do any real layout.
I didn't plan any drawers, as they're fussy to build and
take up more space than they're worth. Plus, I
didn't really have space for a drawer bank even if I
wanted to waste it. I wouldn't mind one or two for
utensils, but wasn't going to go out of my way to
incorporate one. There are other ways to store
utensils. |


 |
One thing I'd been considering in the weeks and months
leading up to this point was to possibly incorporate a
traditional icebox (or possibly high-performance
manufactured cooler) as well as the refrigerator.
Allow me to explain. I've never had refrigeration
on a boat, and have generally been content with
iceboxes, as long as ice is readily and conveniently
available. So I had nothing against the idea of
using ice, to a point. I always knew I'd have the
Engel unit on this boat, but why not also allow room for
a cooler, for cold drinks, and to hold ice cubes for
cocktails? This is important stuff for the way we
cruise.
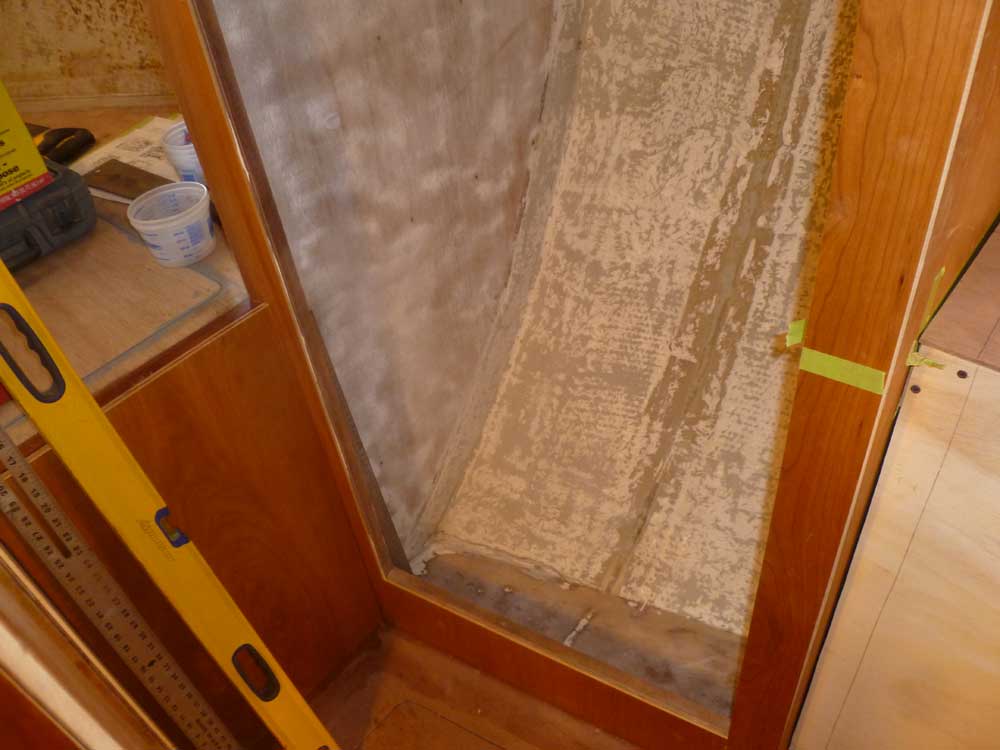
I found myself eyeing the bottom section of the as-yet
unconfigured tall locker just forward of the galley.
There seemed to be a huge amount of space available in
this locker, and with the abundant stowage I'd
constructed across the way in and under the dinette
cabinets, I thought perhaps I could use this section for
the refrigerator or the ice cooler. We don't hang
things, and while I intended to fill this locker with
useful shelving, it seemed like an overabundance of
space, honestly.
As of this writing, I'd yet to determine how to utilize
the space, or whether to move the refrigerator from its
designated space beneath the galley countertop, or
whether to simply build an icebox in the hanging locker,
or purchase a high-performance cooler for the space.
I was leaning towards installing a pre-manufactured
cooler in a dedicated space, this to contain the drinks
and ice as needed, reserving the relatively small
refrigerator for foods that would benefit most from
man-made refrigeration (meat and vegetables). |
 |
With the basics of the galley now mocked up, and a far
better idea of the space available, I expected to
consider things over the next couple weeks and massage
the layout as need be to fit in everything I hoped to,
as well as work with the actual appliances to fine-tune
their proposed installations. |
| |
Total Time Today: 5.75 hours
|
<
Previous | Next > |
|
|