Project Log: Sunday, January 29, 2012
I thought I'd start the day with a simple job. I
had a bypass kit for the steering system, a simple
collection of fittings, hose, an a valve that would
allow me to easily take manual control of the steering
if I so desired. Installing the bypass kit seemed
straightforward: remove the two hose connection
fittings from the brass steering cylinder and install
the kit's pieces in their stead.
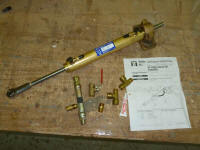
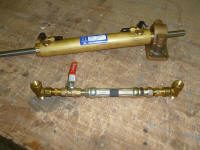
These photos show the original cylinder configuration
and bypass kit pieces as provided, and then loosely
assembled in their correct orientation. The
original cylinder fittings would be installed at the
tops of the bypass kit's tees. |
 |
It should have been relatively easy to remove the
original fittings as required. However, I soon
discovered that the fittings were extremely tightly
installed in the cylinder, and I couldn't budge them.
My wrench simply started to round over the hexagonal
shape of the lower portion of the fitting.
Alarmed, I proceed with much caution, and tried a
different wrench that could spread the load over a wider
portion of the fitting, to no avail.
I tried heating the cylinder to release the grip of what
appeared to be some kind of thread sealant. This
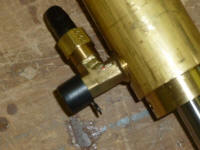
may have been the beginning of the end. I think
the heat softened the brass tee fitting, so my next
wrenching attempt caused the fitting to crack just
beneath the horizontal leg of the tee. |
 |
Obviously I was very unhappy with this development, but
looking back it seemed inevitable. I don't know
what I could have done more carefully to avoid this.
The fittings were screwed in absurdly tightly, and brass
can only take so much.
Now I had no choice but to try and get out the fitting
by any means possible. Replacing a damaged brass
fitting would be no big deal if I could get it out, but
I did want to avoid damaging cylinder itself.
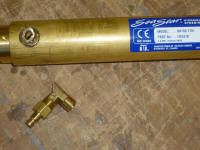
Unfortunately, further attempts only caused the whole
tee fitting to break off, leaving a short stump but
getting me no closer to the removal. |
 |
I set the cylinder aside and, seeking guidance, sent an
email to a tech support person at Teleflex with whom I'd
had useful discourse earlier in my steering planning
development.
I spent the rest of the day on sundry tasks, none of any
great consequence but all working towards a common goal.
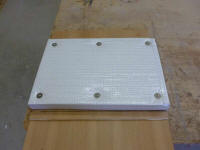
The new engine room was still too fresh to work within
(I'd hoped to pattern and install some additional
insulation on the forward bulkhead), so instead I cut
and installed a panel of insulation on the back side of
the engine room access panel from the main cabin.
|
 |
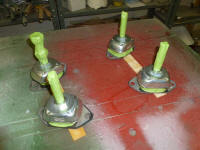
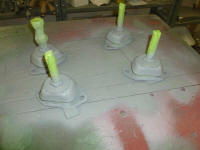
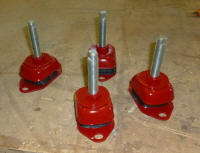
Meanwhile, I removed the flexible mounts from the engine
template and, after masking off the mounting studs and
the rubber portion of the mounts, primed and painted
them to match the engine. I hoped this would look
good and help minimize rusting of the plain steel
mounts. |
 |
Thinking ahead to the pending engine installation, I
removed a couple things from the engine to reduce its
width and bulk slightly. Although the large
overhead hatch in the pilothouse would allow easy engine
passage, my gantry crane (and shop ceiling) was not tall
enough to allow me to get the engine into the boat in
this way. Instead, I planned and expected to hoist
the engine to the cockpit, then slide it in through the
pilothouse door, after which I could run the hoist back
through the overhead hatch and place the engine on its
foundations.
Clearance was tight, but I'd been prepared all along to
cut a wider opening as needed, as I'd really no other
option for engine installation. Fortunately, my
choice of the Beta 38 meant that the basic engine was
narrow enough to pass through. The doorway opening
was exactly 19", and while the overall engine width was
technically 19-7/16", by removing the air filter from
the starboard side I could reduce the width by at least
an inch. I'd also been prepared to remove the
alternator, but it didn't appear to be necessary.
To make installation easier, I also removed the remote
oil filter by detaching the hoses from the engine end.
I made some other general preparations as well.
One of my pet peeves about new engines is the
manufacturers' tendency to spray paint various hoses,
wire harnesses, and so forth; this paint tends to flake
off and make a mess over the life of the engine.
I'd originally planned to remove any painted hoses and
clamps and replace them with fresh, unpainted ones, but
found that on this engine, the one hose that was painted
incorporated an interesting side leg that connected to
another part of the engine, making its replacement more
of a challenge. I decided to leave this hose
alone. Fortunately, the alternator belt wasn't
painted, but I did flake some paint off the end of the
main engine wiring harness, as this process was already
well underway.
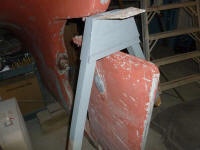
One final detail in the engine room was the A-frame
support beneath the mizzen step in the cockpit. I
had the original support, and saw no reason not to reuse
it. After cleaning it up, removing remnants of old
tabbing, and lightly sanding, I gave it a coat of paint
on all sides, save for the bottom of the legs where I'd
be tabbing it back to the hull. |
 |
| |
Total Time Today: 4.75 hours
|
<
Previous |
Next > |
|
|


