Project Log: Saturday, December 6, 2014
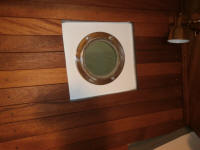
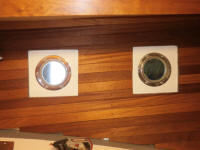
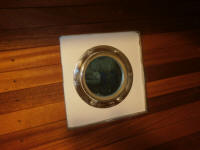
When I installed the ceiling (hull liner) in the forward
cabin some time back, I'd framed out the four round
in-hull deadlights, creating rhomboid openings along
which edges I'd trimmed the ceiling planks. This
left the cut ends of the planks exposed, along with the
plywood support strips. All along I'd planned to
trim these out, and the time had finally arrived to
complete this task.
|
 |
Though I didn't spend any time worrying about details
beforehand, given the nature of the four openings I'd
expected to build L-shaped trim pieces that would
overlap the edges of the ceiling planks, and extend into
the openings to cover the exposed framework that defined
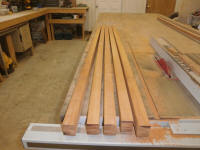
the spaces. So with basic measurements in hand,
and a piece of leftover mahogany stock thick enough for
the job, I milled as many blanks as I could (five),
preparing to further mill the blanks into the trim
profile required. |
 |
I needed a 7/8" depth to cover the framing, plus enough
to overlap the board ends. But with 7/8" stuck in
my mind, I began by resawing one of the square blanks to
7/8" thickness--an error I caught quickly, when I'd
sawed about halfway into one of the blanks.
Regrouping, I changed the saw setting to 1-1/4", and
resawed each blank accordingly.
I found that the stock was significantly bowed, however,
and I just didn't like the looks of it after I'd resawn
the initial pieces--it looked like it was going to be
hard to work with for this application.
Additionally, I'd been thinking of the inconsistently
rhomboid shapes of the openings, which I'd known all
along would require some fussy measuring in order to
miter the trims cleanly at the corners--doable, but not
my favorite sort of thing, and it would have required
many trips back and forth from the shop to the forward
cabin. The shapes of these openings had been
dictated by the actual positions of the vertical ceiling
frames, and whatever had looked good, rather than to any
sort of symmetrical pattern or design.
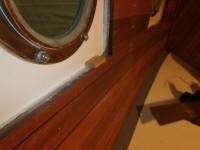
I started to rethink the plan to better suit the
realities--something simpler in execution. Instead
of a single trim profile to do it all, I decided to try
a two-piece approach, beginning with strips of mahogany
trim within the openings to cover the plywood frame
edges and flush with the surface of the ceiling planks,
over which I'd install simple flat trim to cover the
seam, leaving a reveal. I milled some
additional stock into 7/8" width by about 1/4" thick,
and tested a small piece to ensure that this size worked
properly. |
 |
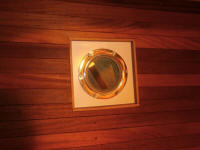
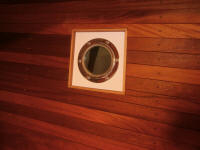
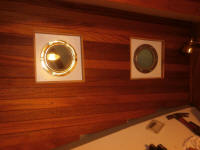
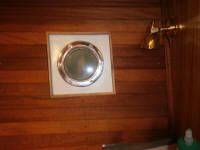
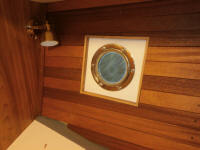
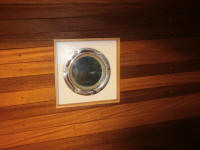
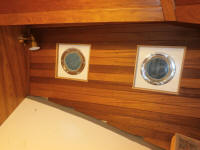
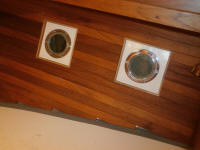
Happy with this, I used a small portable miter box and
hand saw to cut and install the inside trim pieces on
each of the four openings. I made simple butt
joints at the corners, since most of the edge seam would
be covered with the flat trim on top. I installed
the inner trims with stainless brads into the plywood
framing. |
 |
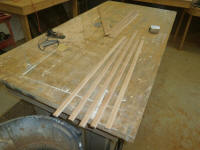
This looked better already. Now, I needed flat
trim on top, which would cover the final seams and leave
an additional reveal for further texture to the
openings. From leftover cabin sole offcuts--the
same wood I'd used for the ceiling planks--I milled a
series of 1" wide trim pieces. Leaving the
original chamfered edge profile on one side, I ran the
newly-cut opposite edge through my little router table
equipped with a 1/4" roundover bit, and sanded the new
profile smooth. |
 |
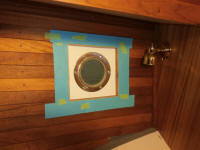
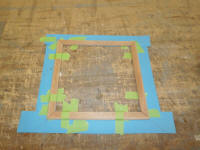
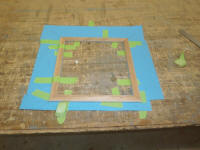
To reduce the fussiness factor and save me
who-only-knows how many trips between the saw and the
boat, I templated the deadlight openings with paper
strips, which I taped together over the framework in the
boat, leaving the reveal I wanted, and which, when
complete, gave me the actual size and shape of the
opening I needed to frame with the flat trim, and which
I could bring down to the shop and use to determine,
cut, and fit all the mitered corners accurately and with
as minimal effort as possible. I made little marks
at each corner to help me align the wooden trim once I'd
cut it, so that it would start out in the appropriate
places. |
 |
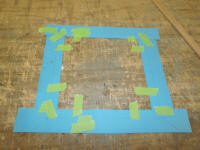
I secured the pattern to my bench with tape, then used
one of the pieces of trim to trace out the width around
the edges, after which I could bisect each corner angle
on the paper itself, which would serve as the necessary
patterns for my miter cuts. |
 |
From here, it was pretty straightforward to cut and fit
each piece of trim directly from the pattern.
Since none of the corners were square, this required
several test fits and fine-tuning for each corner, but
this was easy since there was no measuring nor
calculating required, just a few steps back and forth to
the nearby saw and test-fitting against the pattern. |
 |
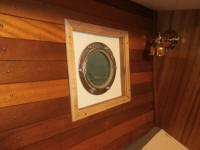
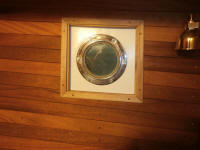
I numbered the pieces, drilled pilot holes for screws,
and, up in the boat, taped them all in place to allow me
to adjust their positions as needed so the corner joints
ended up tight and in the right places. Then, I
screwed the trim into place with the same round-head
bronze screws I used for the rest of the ceiling
details. |
 |
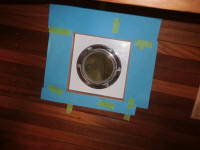
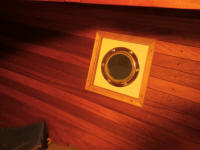
Happy with my proof of concept on the first deadlight, I
quickly repeated the process on the second one on the
starboard side, which went even more quickly now that I
had had one on which to practice. |
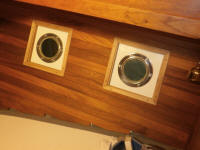 |
I thought this was a good, simple look in keeping with
the remaining ceiling details, and effected with minimal
fuss and time once I got rolling. I'd finish up
the process with the port deadlights next time.
|
Total Time Today: 4.25 hours
|
<
Previous |
Next > |
|
|


