Project Log: Saturday, February 18, 2012
I spent the day largely on through hull duty,
interspersed with other miscellany. As was
so often the case, the list of tasks was
straightforward, but planning for future installations
and access extended the process.
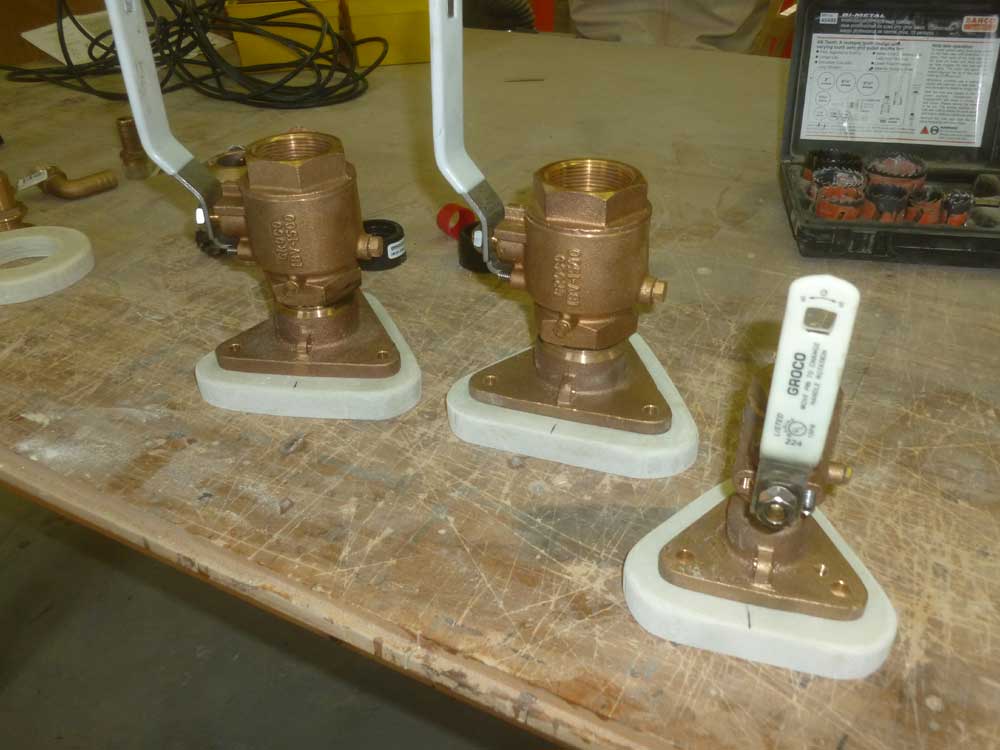
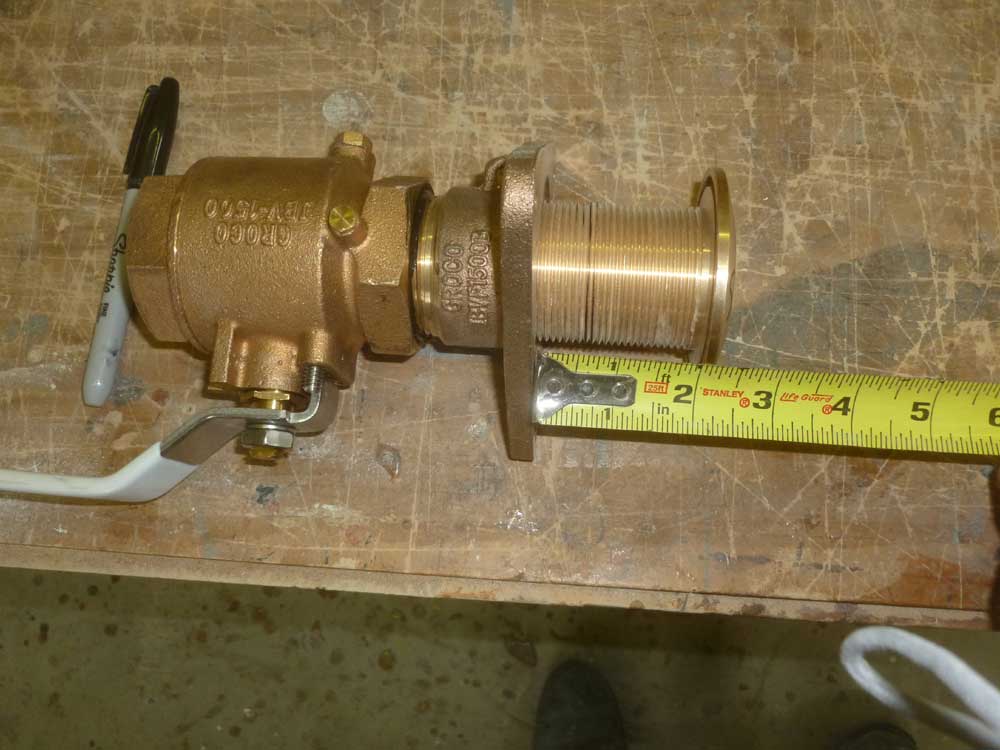
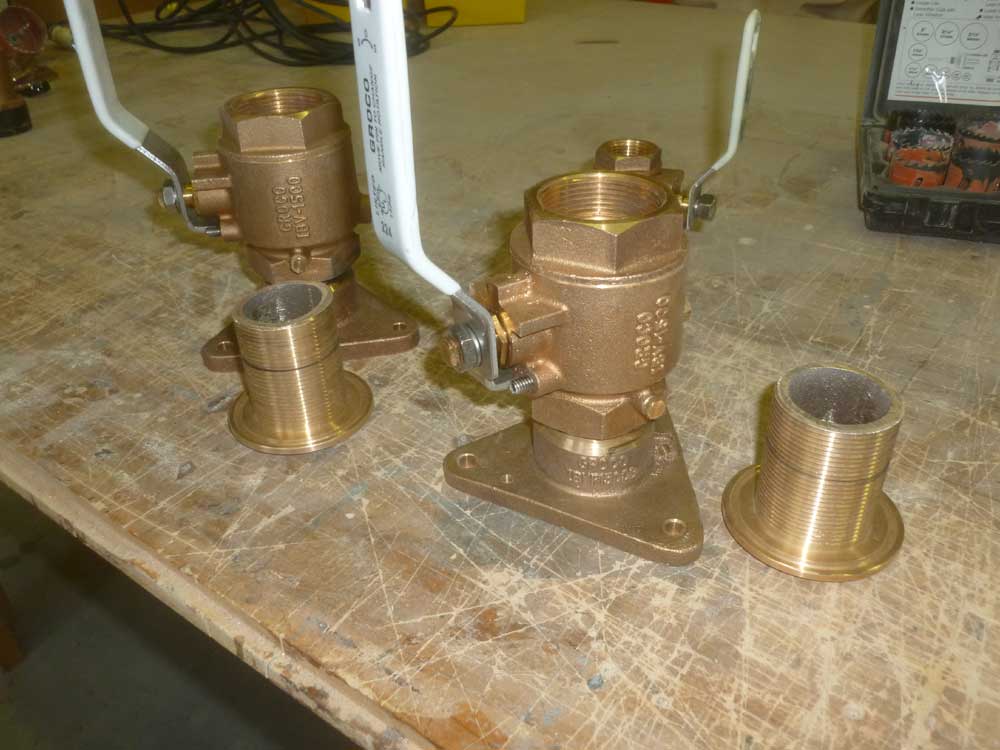
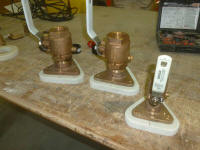
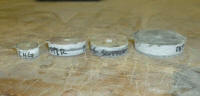
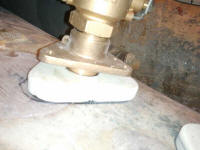
To begin, I assembled the three bronze ball valves on to
their respective bronze flange adapters. While it
is more convenient to install the flanges without the
bulk of the valve in place, pre-installing the valves
meant that I could choose how to position the fitting
and valve handle in the final installation--important so
the valve handle ended up in an advantageous position,
and also (to me) so the flange bases and fittings looked
good and appropriately aligned/symmetrical when
installed. Using a vice and large wrenches as
needed, and with pipe dope on the threads, I installed
the valves on each fitting the way I wanted them. |
 |
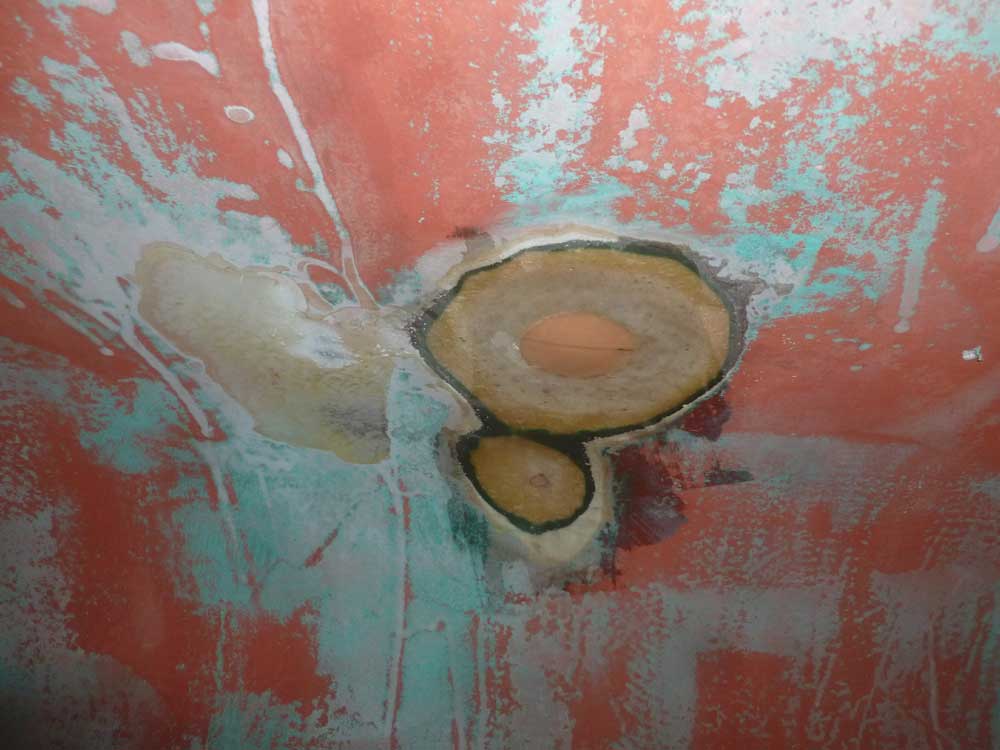
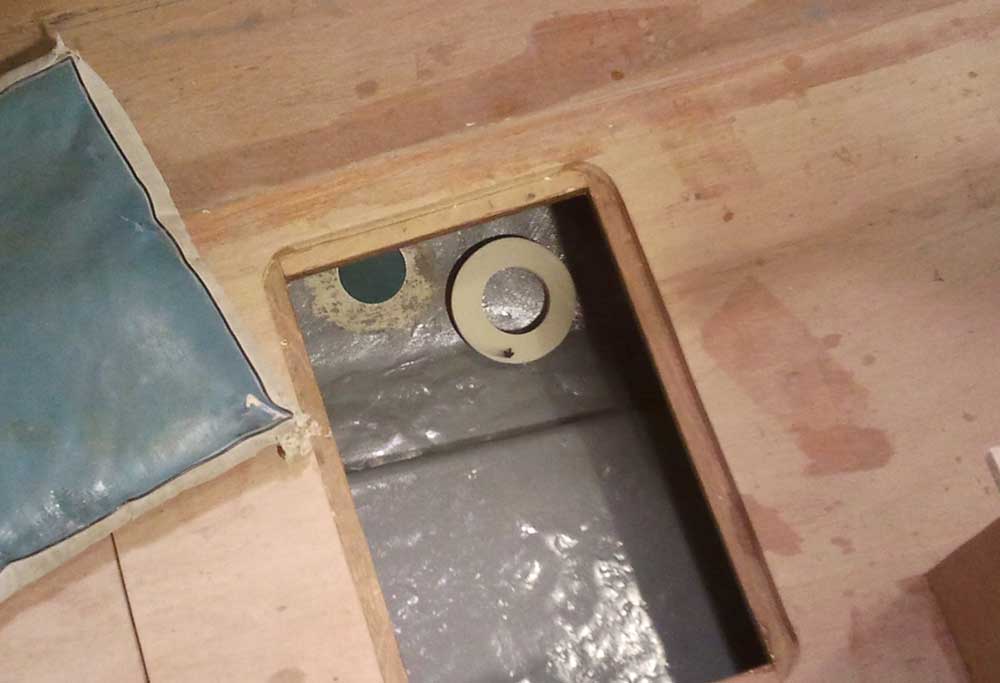
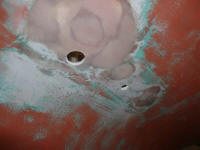
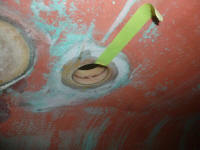
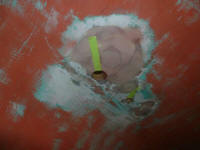
Within the limits of the cabin sole bilge access hatches
I'd constructed, I determined the location for the new
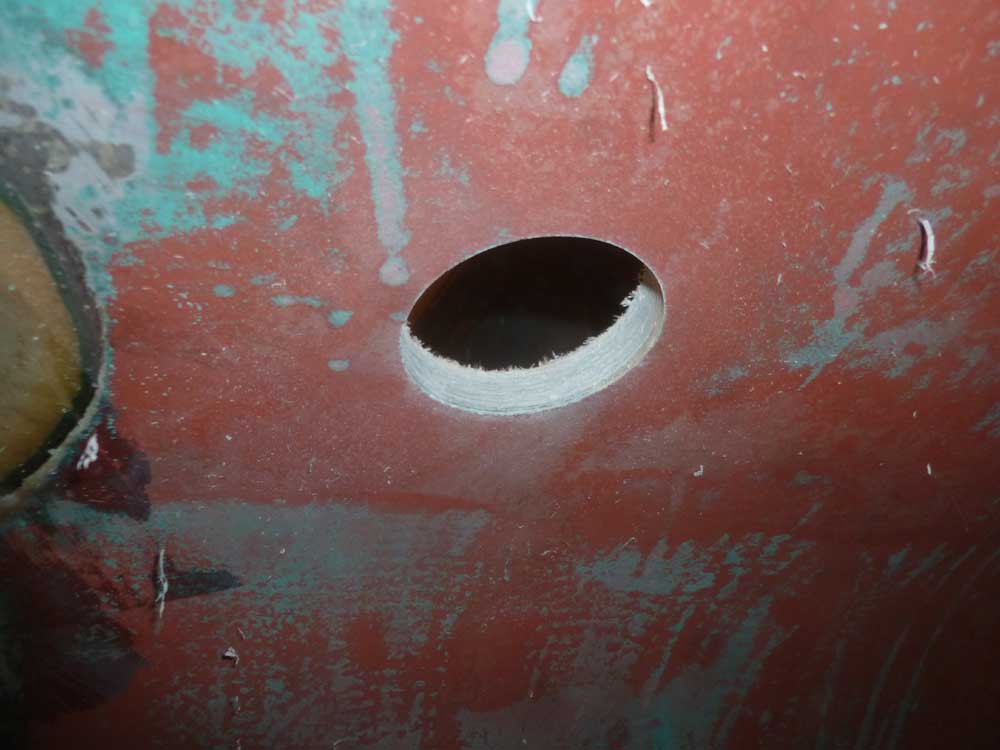
depth transducer. I decided to locate the
transducer a bit forward of the old location, almost
entirely because I remembered while scoping out the
location that I'd never gotten around to installing
fiberglass patches over the exterior of the original
hole. Long ago, I'd filled the hole, and patched
the inside, and even ground out around the exterior to
accept the new material, but for whatever reason I'd not
gotten to the exterior patching. |
 |
There was no compelling reason to reuse the old
location; indeed, that's why I filled the old hole (and
all old holes). However, I might well have used
the same general spot except that to do so now would
slow me down by a couple days, the amount of time
required to install and fair the exterior patch.
Though now seemed a good time to scratch this minor job
off the list anyway, I didn't care to postpone
installing the through hull while I completed it.
Instead, I moved the location slightly forward, which
would tuck the transducer more toward the forward end of
the access hatch, a plus for additional protection.
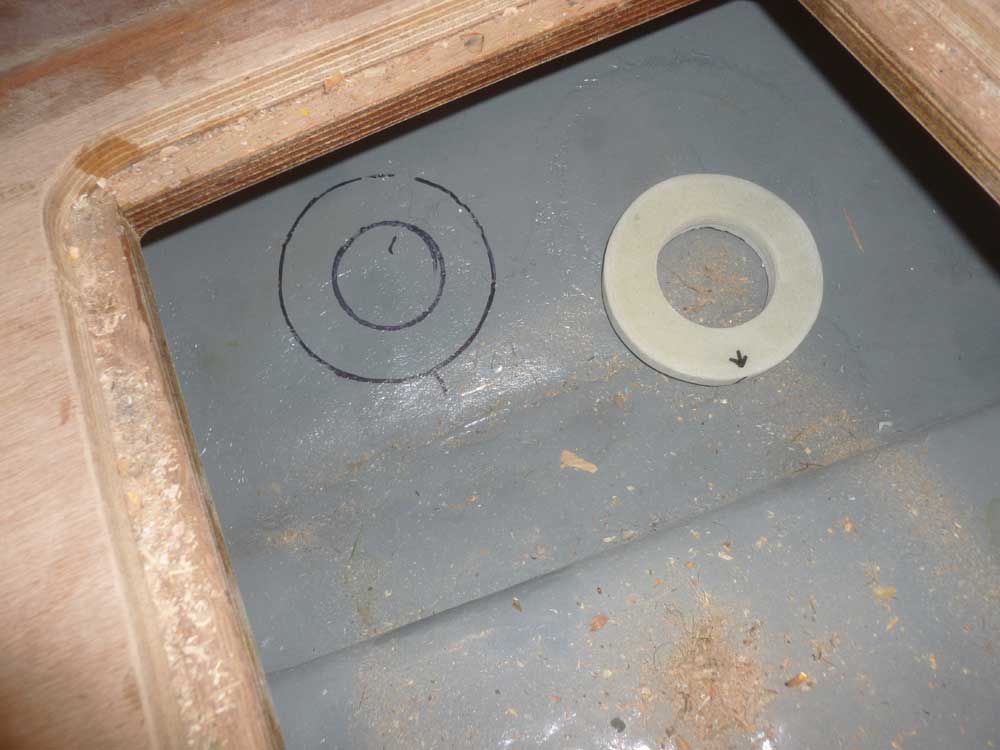
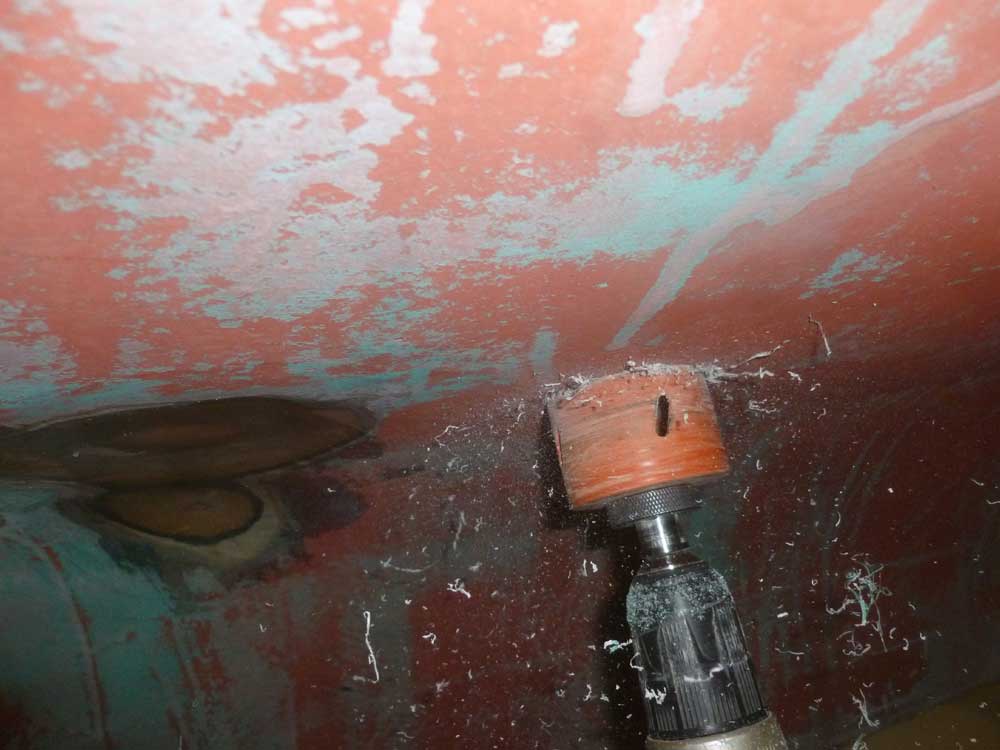
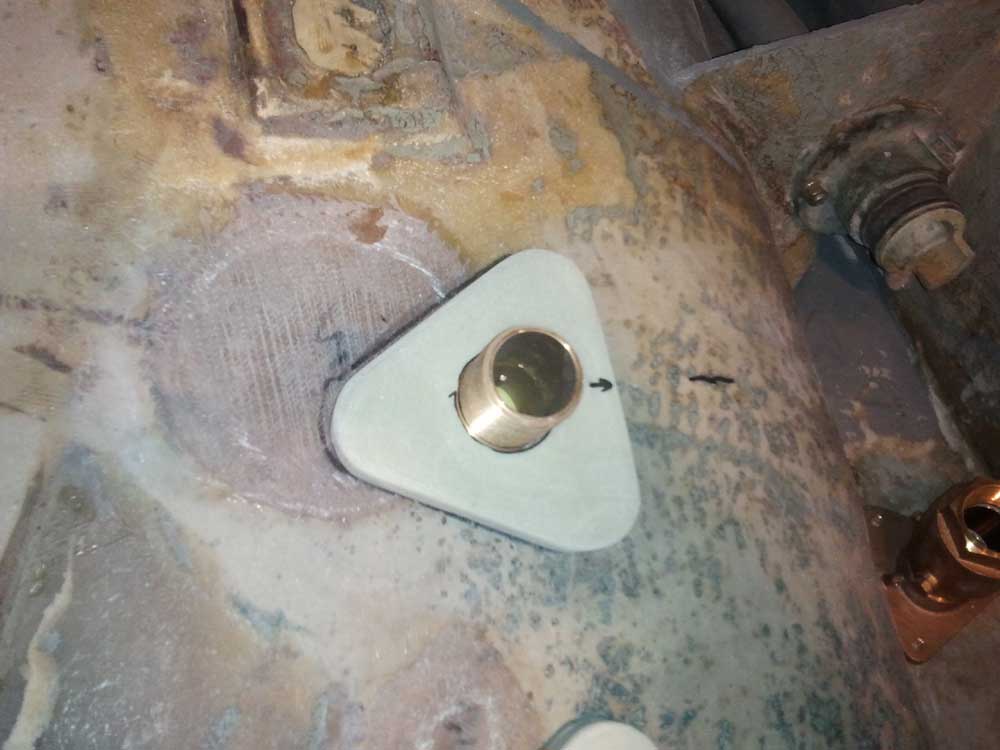
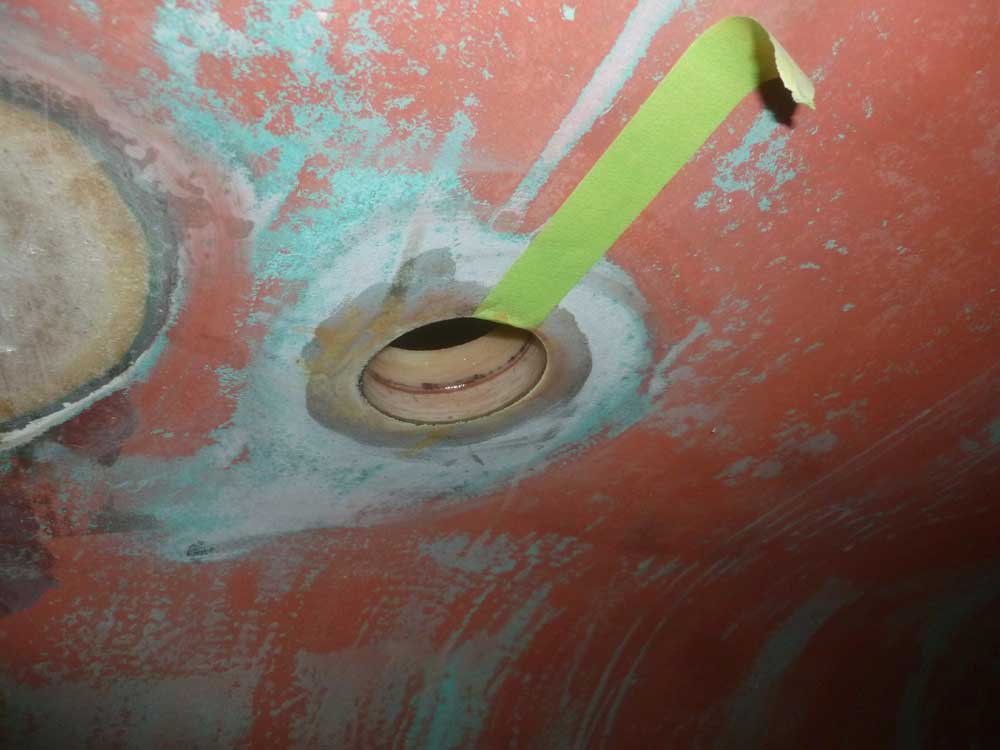
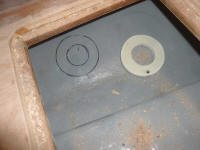
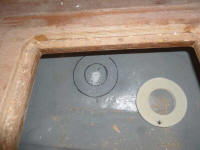
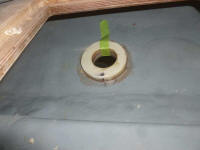
After determining a location that allowed for the
backing ring, as well as reasonable access to tighten
the transducer nut, I marked the spot and drilled a
small pilot hole through the center so I could ensure
the location worked from outside as well. Then, I
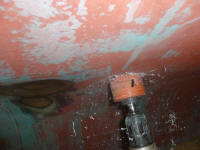
drilled the requisite 2-1/2" hole from outside.
The hull in this area was approximately 1/2" thick.
Later, I sanded away the paint from inside and outside
as needed. |
 |
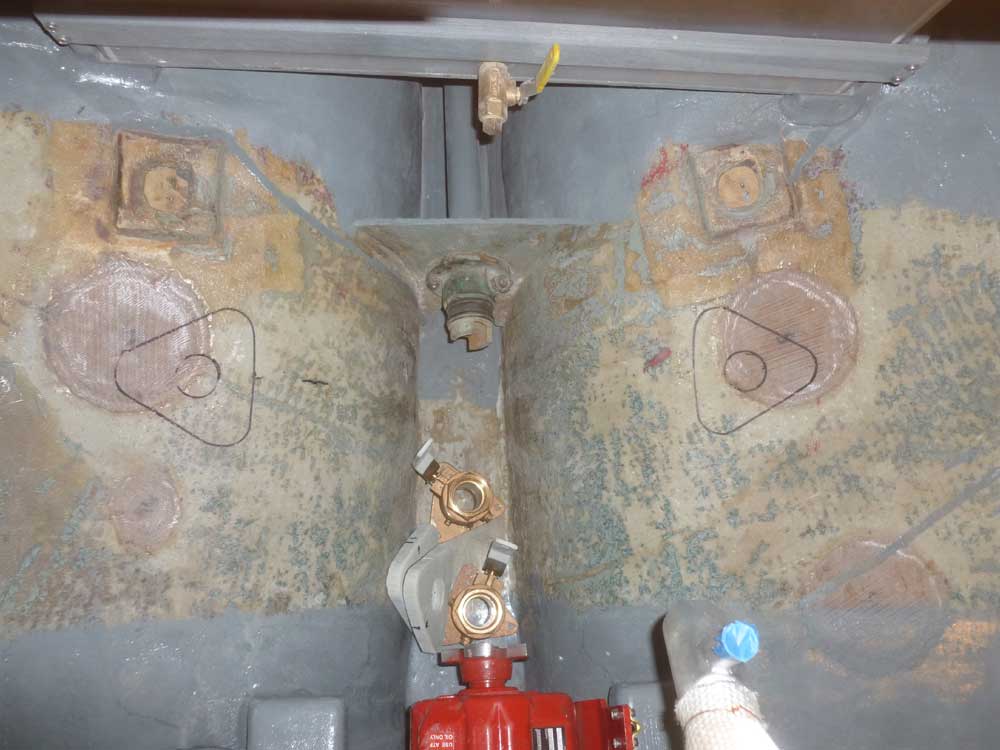
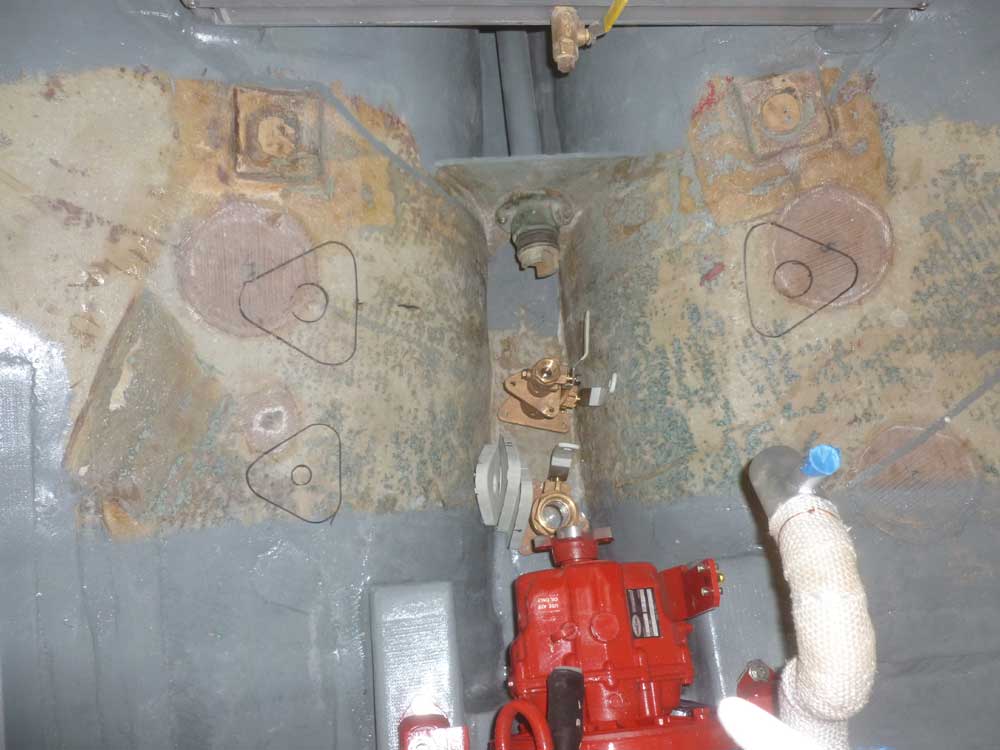
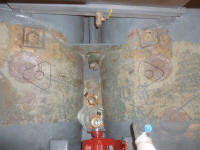
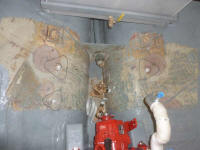
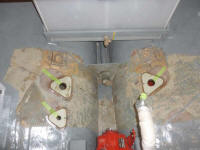
Moving aft to the engine room, I contemplated the three
fittings I had to install: two cockpit scuppers
and the engine intake. Here I had to do some
advance thinking and planning to ensure the fittings
weren't in the way of something later on, and also that
I could maintain as reasonable working room as possible
for all future maintenance tasks.
As elsewhere, I'd patched the original through hull
locations, so I was not bound by them in placing the new
fittings. I decided to move the scupper through
hulls slightly inboard, further towards the keel, to
keep the seacocks more out of the way and give me better
access to the aft, outboard ends of the engine room.
Also, the old locations were not symmetrical, which
bothered me.
Before I could finalize the location, however, I got
thinking about the engine exhaust and waterlift, and
also about a potential platform spanning the hull aft of
the engine--both for ease of working there and also
(potentially) to support a waterlift. This tangent
led me down the road of waterlift selection, where I
analyzed the various choices to determine what shape and
position might work best not only within the spaces
available but also to attempt to maintain desirable
height clearances to prevent exhaust backflow.
The ideal position never seems to make itself available
in any boat, but eventually I determined a couple
possibilities and, at the same time, discounted the idea
of the shelf/platform for the waterlift and/or working
platform across the shaft alley, since the height of the
shaft would have made the platform too high to be
worthwhile as a waterlift support, and also awkwardly
high otherwise. The end result of all this was
that I eventually determined--in spite of continuing
questions about the exhaust system--that I could, and
should, place the scupper through hulls where I'd
originally intended.
After locating one, I took some basic measurements and
located the opposite one in the same relative position,
tracing around the backing block and the inside hole. |
 |
In addition, I now had to decide where specifically to
locate the engine intake, not only for access but also
for convenient hose runs to a sea strainer, and from
there to the water pump on the forward side of the
engine. Of course this is when I also realized
that the raw water strainer was one installation I'd not
necessarily planned ahead for in the layout of the
engine room accessory panels, so to be sure I took care
of that soon, I took a few moment to locate and order
the strainer I wanted. I should have had it on
hand before now, but I couldn't think of everything all
the time, and this thing had simply slipped my mind.
Depending on the final layout of the fuel system
components (which I'd be getting to soon), I figured the
sea strainer would end up on either the starboard engine
room panel, towards the aft end, or on a new panel just
behind. Maybe if I had it all to do again I might
have made room for the sea strainer forward of the fuel
filter assembly, for potential access through the hatch
from the cabin, but frankly I didn't think this was that
important. Access would be excellent in my
proposed location; I'd just have to lift the floorboard,
which is pretty much how I anticipated dong any
inspection or maintenance work anyway.
The net result of all these mental gymnastics was that I
decided to install the engine intake through hull on the
starboard side, just forward of the scupper. This
would provide convenient and short hose runs to the sea
strainer nearby, and the hose to the pump would just run
where it needed to run. I positioned the fitting
how I wanted it, and marked it. Afterwards, I
drilled pilot holes so I could locate the fittings from
outside before committing to their locations.
|
 |
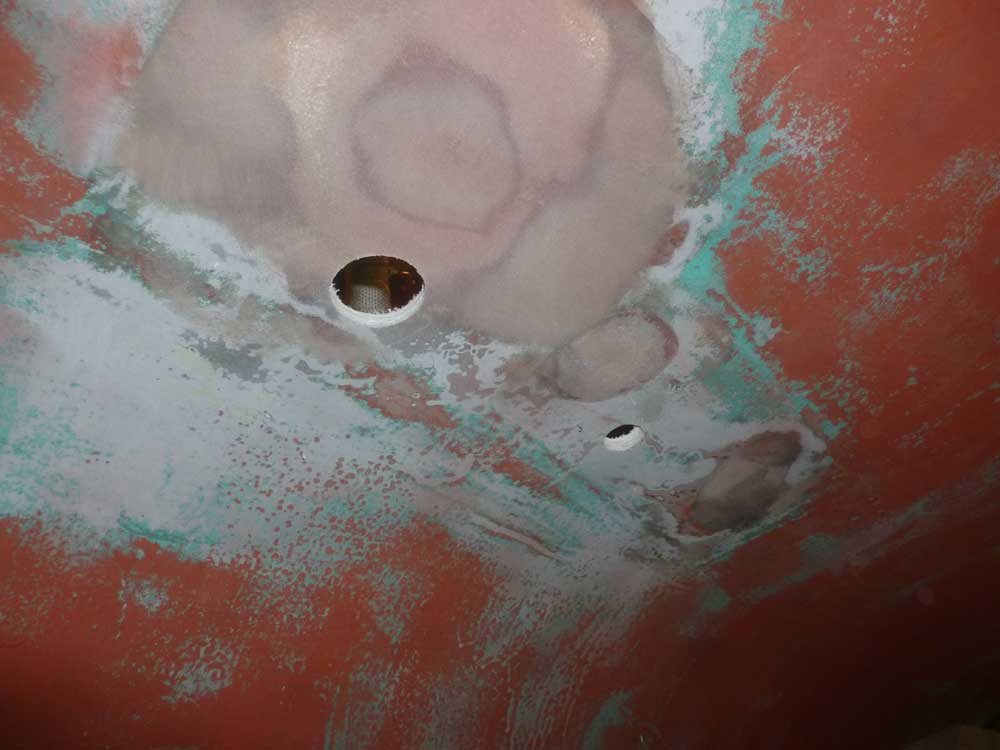
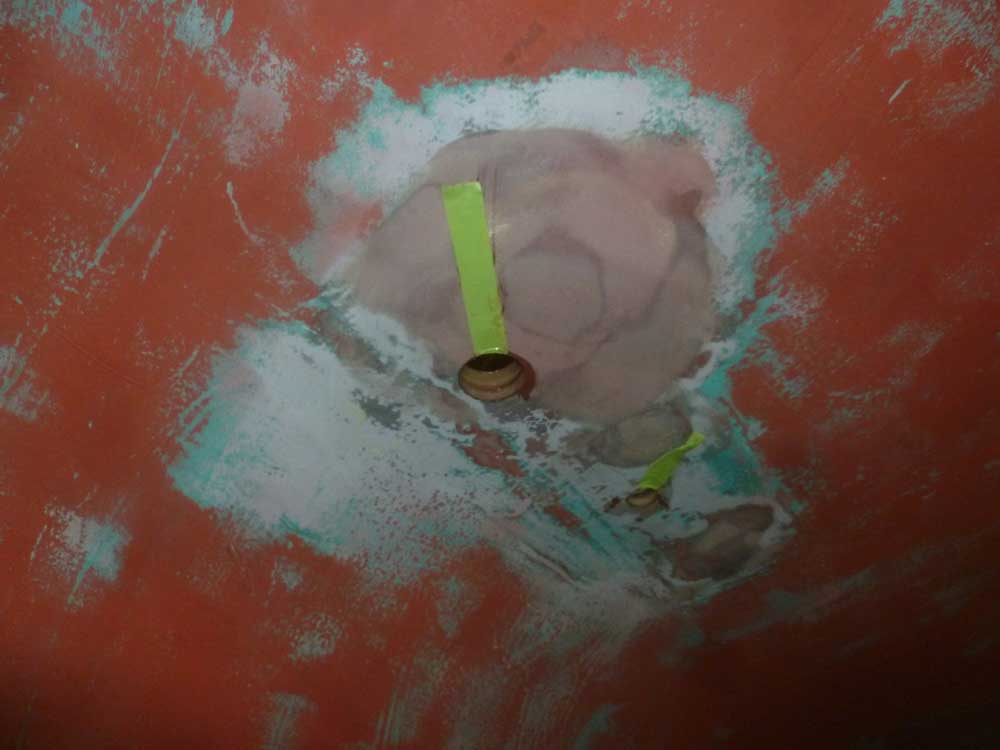
Next, I drilled the holes for the through hulls from
outside. The hull in these areas was a bit thinner
than down by the keel, about 3/8" thick. |
 |
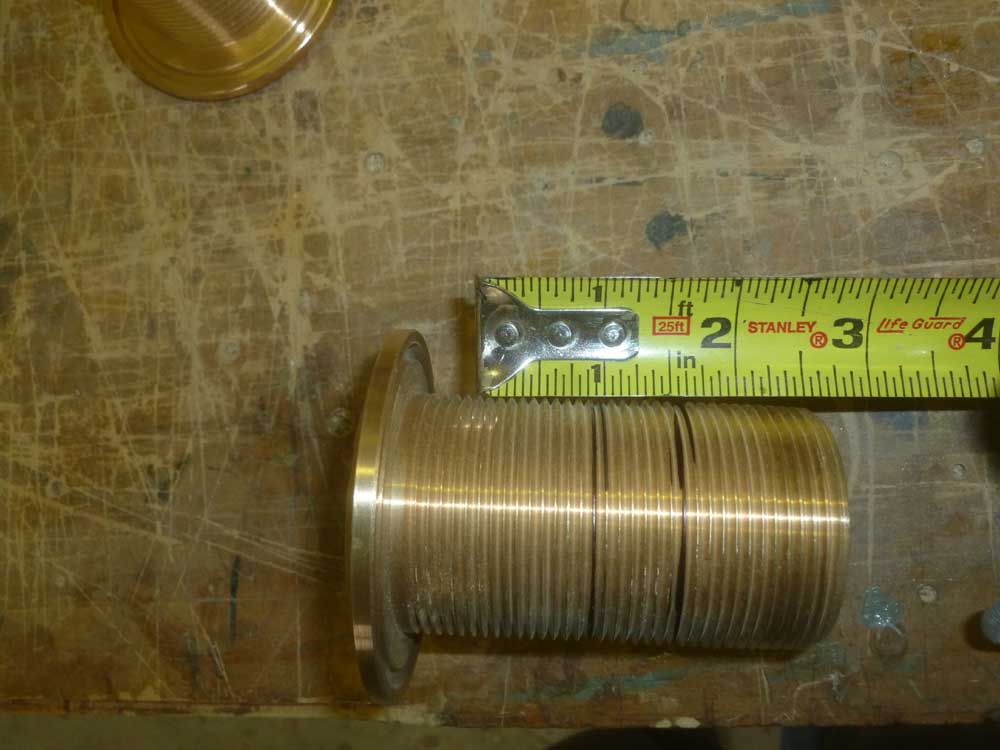
Next, I dry-fit the through hulls, backing blocks, and
flange/valve assemblies to determine how much, if any,
of the through hull body length I'd have to cut off.
As with two other 3/4" fittings I'd already installed, I
determined that the engine intake through hull was short
enough that cutting was not necessary.
However, the 1-1/2" scupper through hulls were much
longer, and with the flange/valve assemblies threaded on
all the way, there was a substantial gap representing
the amount of extra thread length I'd have to cut off.
I made some marks where the fittings came through the
backing block and bottom of the flange; about 5/8" of
additional length. |

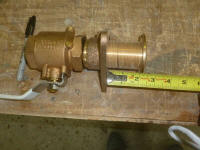
 |
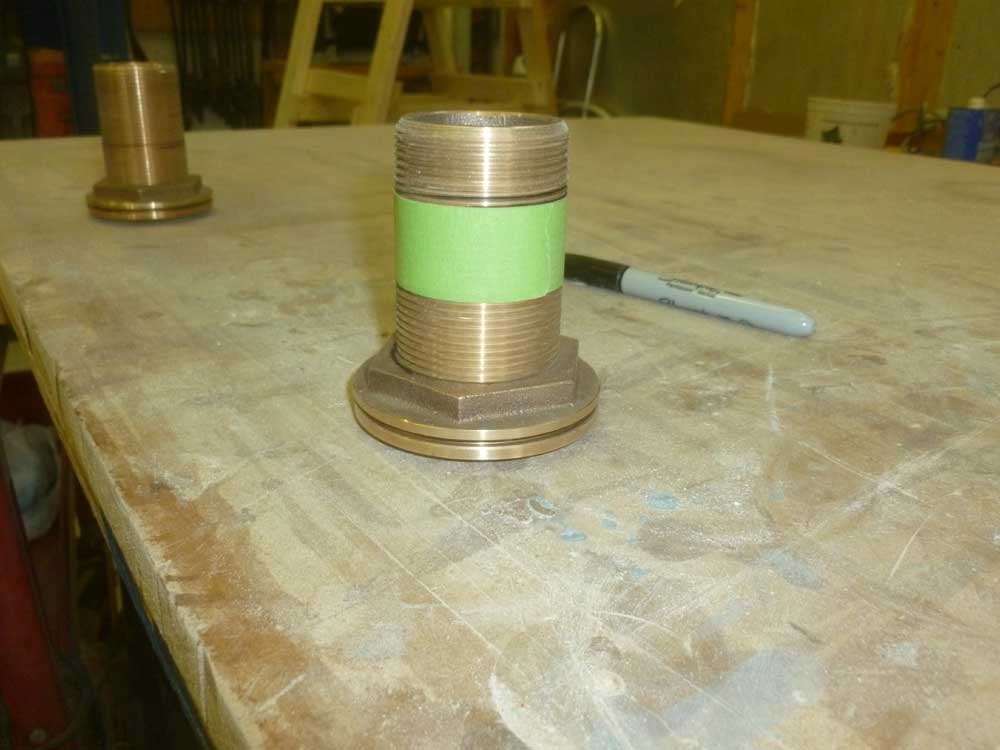
To ensure that the fitting wouldn't bottom out, I cut
off about 3/4" on each of the two fittings, after which
the basic pre-installation steps were complete. |

 |
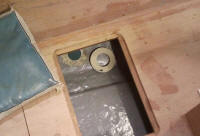
After some final cleanup inside and out, and removal of
paint as needed in way of any of the new fittings, I
installed the backing blocks in epoxy at each of the
four locations. To prevent any sliding while the
epoxy cured, I held the blocks with some tape through
the holes, and only installed the blocks at the end of
the day so I wouldn't be on the boat and shaking things
around. |
 |
| |
Total Time Today: 6.25 hours
|
<
Previous | Next > |
|
|